Sometimes you’d rather not have clients schedule themselves. Here’s how to remove that option for your clients in Paperbell.
Step One: Choose Payment First Checkout Flow
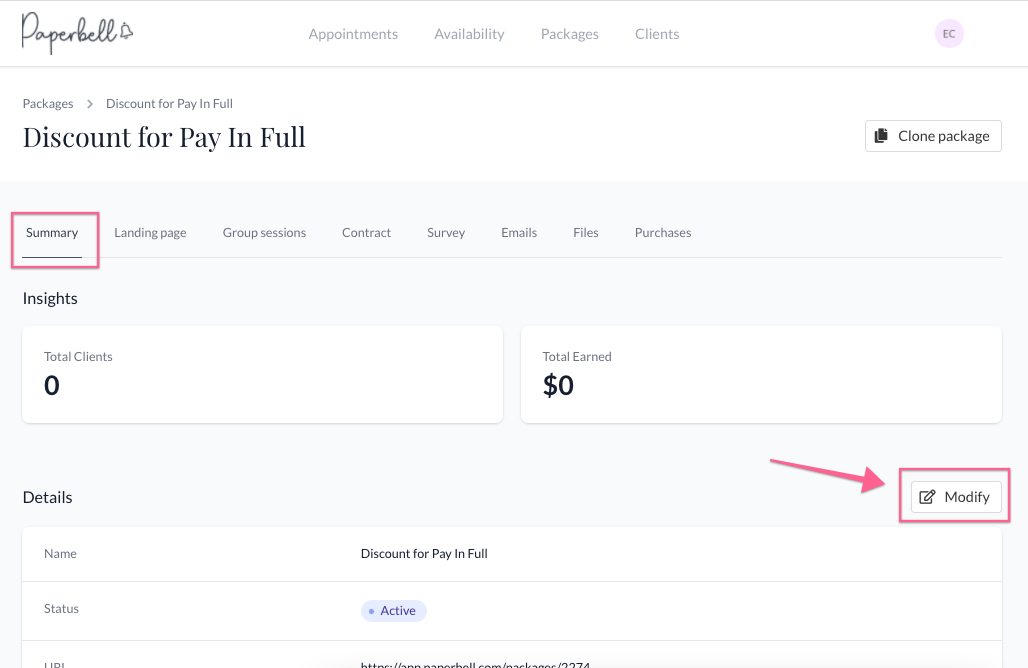
Go to your Packages page and click on the package you’d like to modify (create your package first if you haven’t already done so).
Then click “Modify” the button in the Summary tab

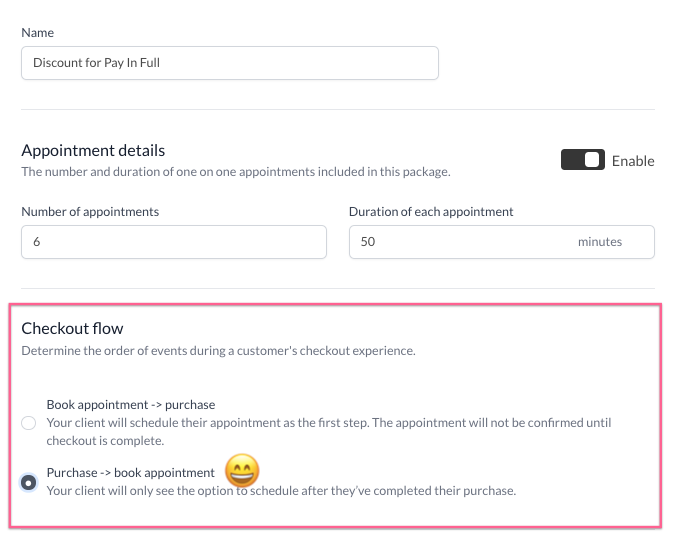
Next, select the “Purchase -> Book appointment” option (this will not be selected by default)

Step Two: Remove Your Availability
Clients can’t book if there’s no time available to be booked. So you can either have no availability across Paperbell, or just none for that package.
How To Disable Self-Booking Universally
This requires a bit of a “hack” – add one timeslot to your availability that’s in the past (so that you won’t actually be available). If you have no availability in the past or future, Paperbell will not work so you need to add one timeslot.
How to Disable Self-Booking For Certain Packages Only
To disable self-booking for certain packages only, you simply need to not apply your availability for those packages.
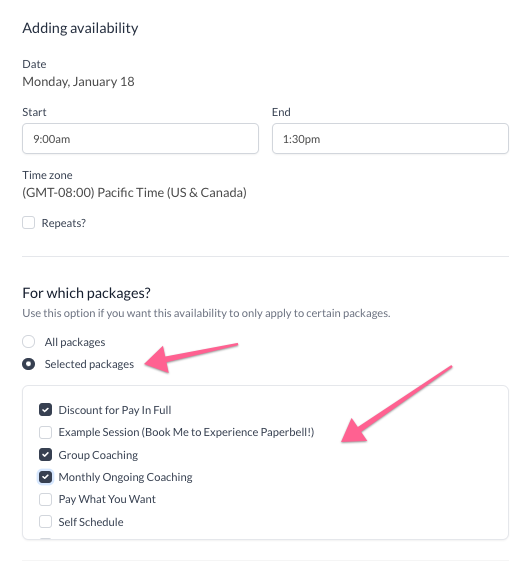
Make sure for each availability slot, you have the “Selected packages” option selected. Then do not check any packages in which you don’t want clients to schedule themselves. (Because no availability means that the booking is not possible.)

What if I just don’t need any kind of scheduling in my package?
A Paperbell package does not have to include appointments – simply disable the “Appointments” option in your booking. If there are no appointments, no booking options will be presented to your client.
However, PROCEED WITH CAUTION! We strongly suggest you use this option if the package truly has no appointments. (For example, if you’re selling a digital download.) If you do have appointments, not including them will mean you won’t be able to track appointments or tie the number to the package, and you’ll miss out on one of the most useful parts of Paperbell.
keywords: disable, scheduling, booking, schedule, calendar, remove, ability
