You will sync up your Google, Outlook, or Apple iCloud calendar to your Paperbell account: Paperbell adjusts your availability for clients based on the busy events in your external calendar.
To connect your calendar, first head to the Calendar Integration page in your Settings.
Click on your calendar of choice (yes, you have to pick just one here!).
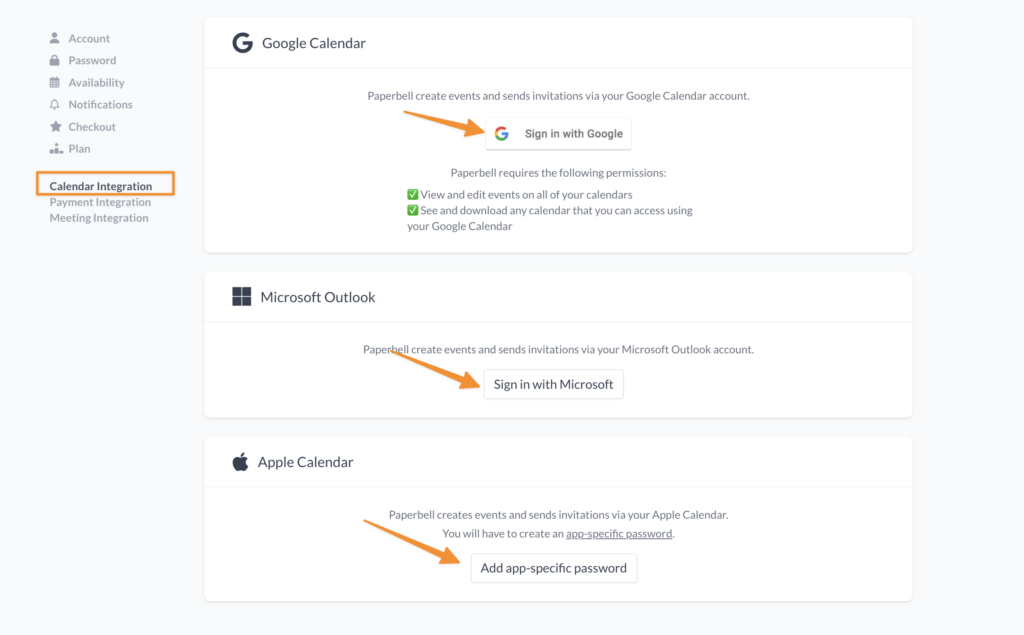
Google Calendar
Click on the “Sign in with Google” button if this is your calendar. You’ll want to make sure that you approve all the permissions for Paperbell to access your calendar.
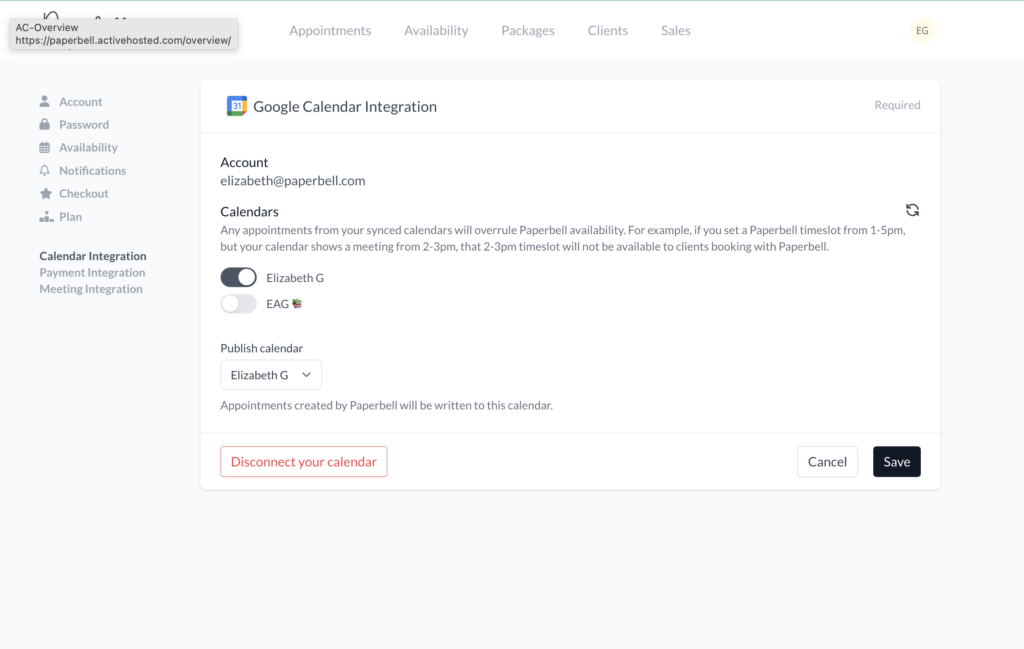
Once it’s hooked up, you’ll see a list of all the calendars that are synced to your Google calendar, and you can toggle them off or on, depending on whether they affect your Paperbell availability.
Google Calendar Error
If you try to create an appointment, and get this unsightly and semi-stressful error:
Signet::AuthorizationError: Authorization failed. Server message: { “error”: “invalid_grant”, “error_description”: “Bad Request” }
Don’t fear! It means Paperbell doesn’t have the access it needs to your Google calendar.
To fix this, you’ll just go back to the Calendar Integration page in your Settings, and click the button that says “Disconnect your calendar.”
Once you’ve done that, you’ll go through the connection step again of signing back into your Google account and authorizing Paperbell by selecting all the permissions.
If you want to sync up multiple Google calendar, from different Google accounts, you can do that. Check out our help page for other tricky Google calendar situations!
Microsoft Outlook Live Calendar
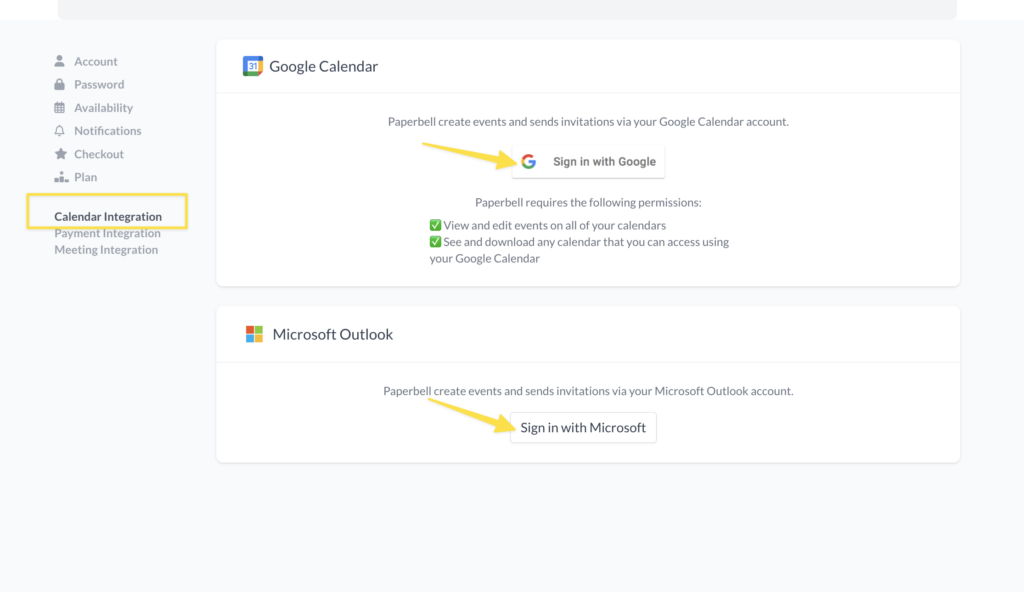
Click on the “Sign in with Microsoft” button, and sign into your Outlook Live account.
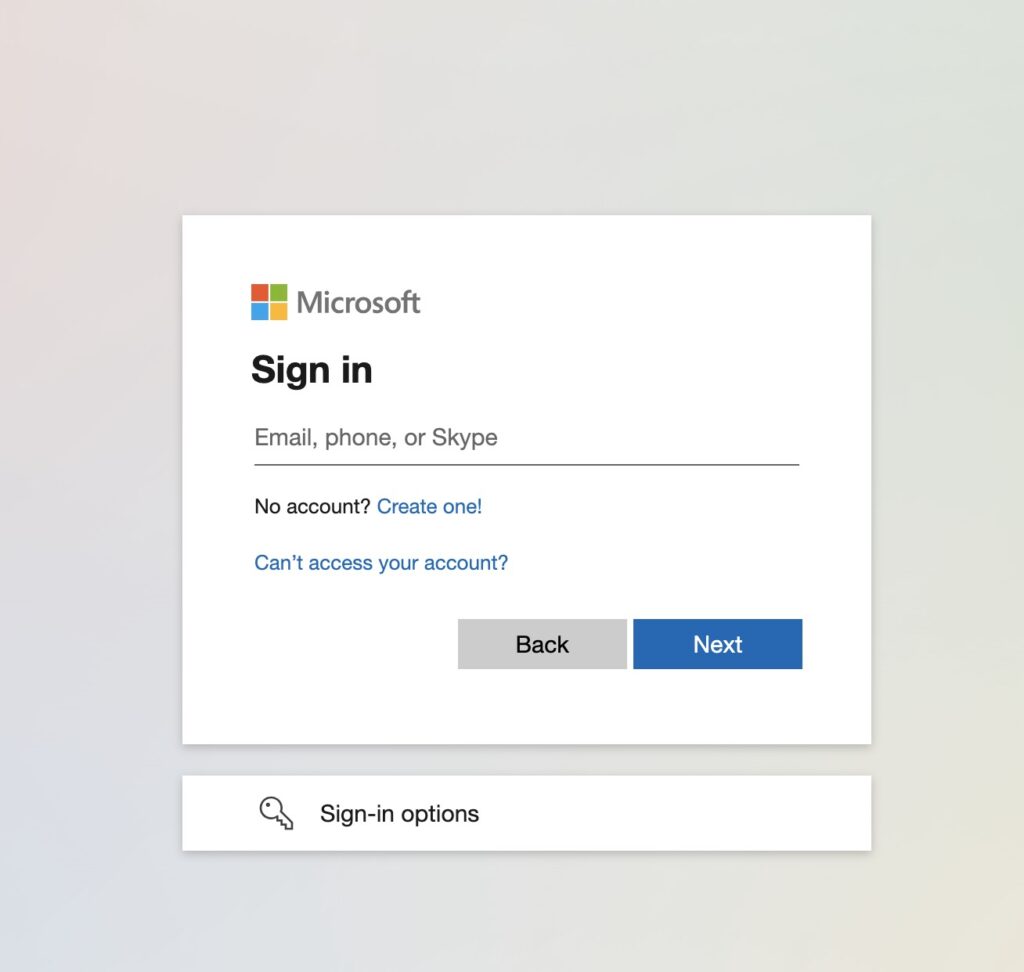
Once your calendar is hooked up, you’ll see a list of all the calendars that are synced to your Outlook calendar, and you can toggle them off or on, depending on whether they affect your Paperbell availability.
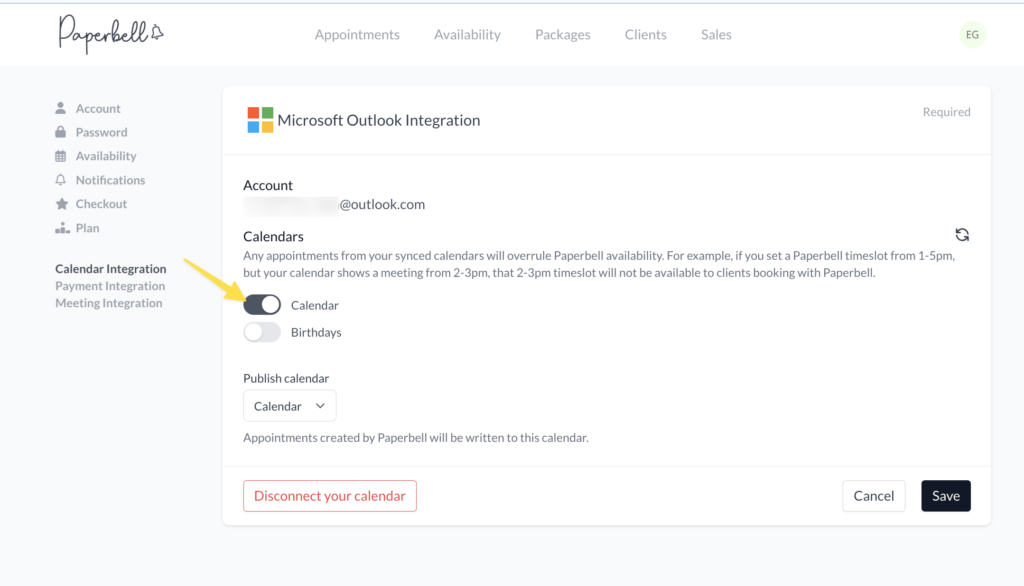
Connect your desktop Outlook calendar to your Outlook Live account
Paperbell syncs to your Outlook Live account (that’s the one that lives in the cloud! ☁️) — so if you also use Outlook on your desktop, you need to make sure that calendar is synced up to your Outlook Live account (found when you log in at https://outlook.live.com/).
This is a little fiddly, but we found that a kind soul explained all the steps on this page.
If you run into trouble, just send us an email at hello@paperbell.com, and let us know where you hit a snag. We’ll be happy to help!
Apple iCloud Calendar
Before you dive in, please start by logging in to your iCloud account and going to your Calendars. Check to make sure all the calendars you’d want Paperbell to know about are listed there.
You can also add a new one specifically for Paperbell: later in the process you will be able to choose for your Paperbell-booked appointments to be added to that calendar.
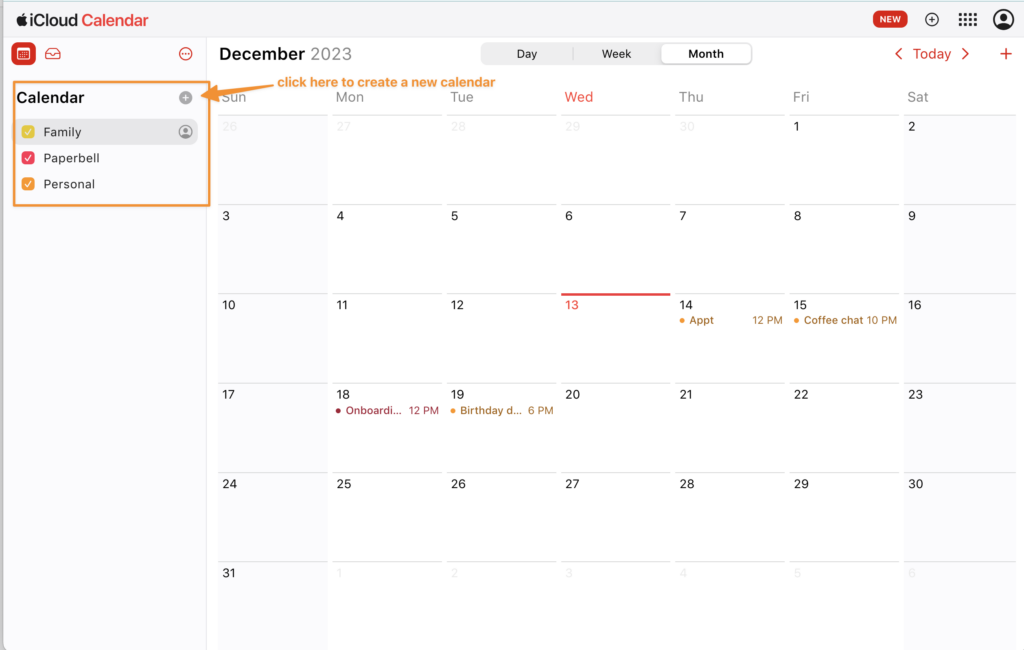
If necessary, you can also add other types of calendars to your iCloud calendar here.
Now, you’ll set up an app-specific password that Apple requires when you connect your calendar to Paperbell.
Step 1 – Go to https://account.apple.com/ and log in with your current Apple ID and password.
Step 2 – When you log in, you should see your Sign-In and Security settings. Click on the tile that says App-Specific Passwords. A window will pop up to create a new app-specific password.
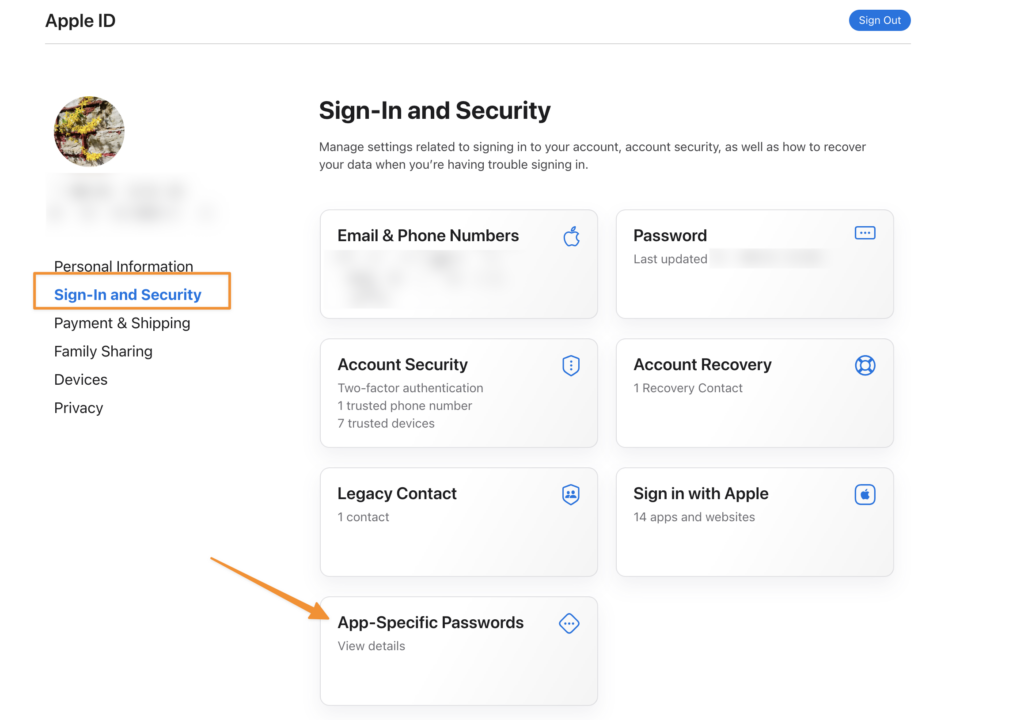
If this is your first app-specific password (yay!), this is the window that pops up:
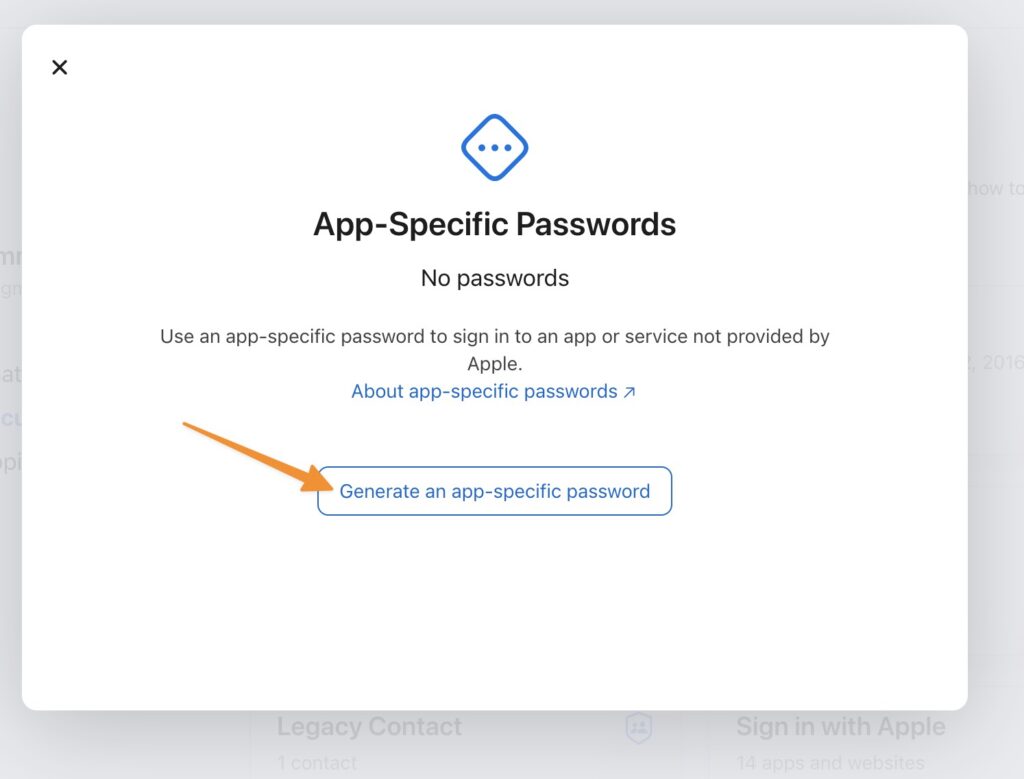
Step 3 – Click the button that says “Generate an app-specific password.”
If you have already created one (or more) app-specific passwords to connect your iCloud account to other apps, your window will look a tad different:
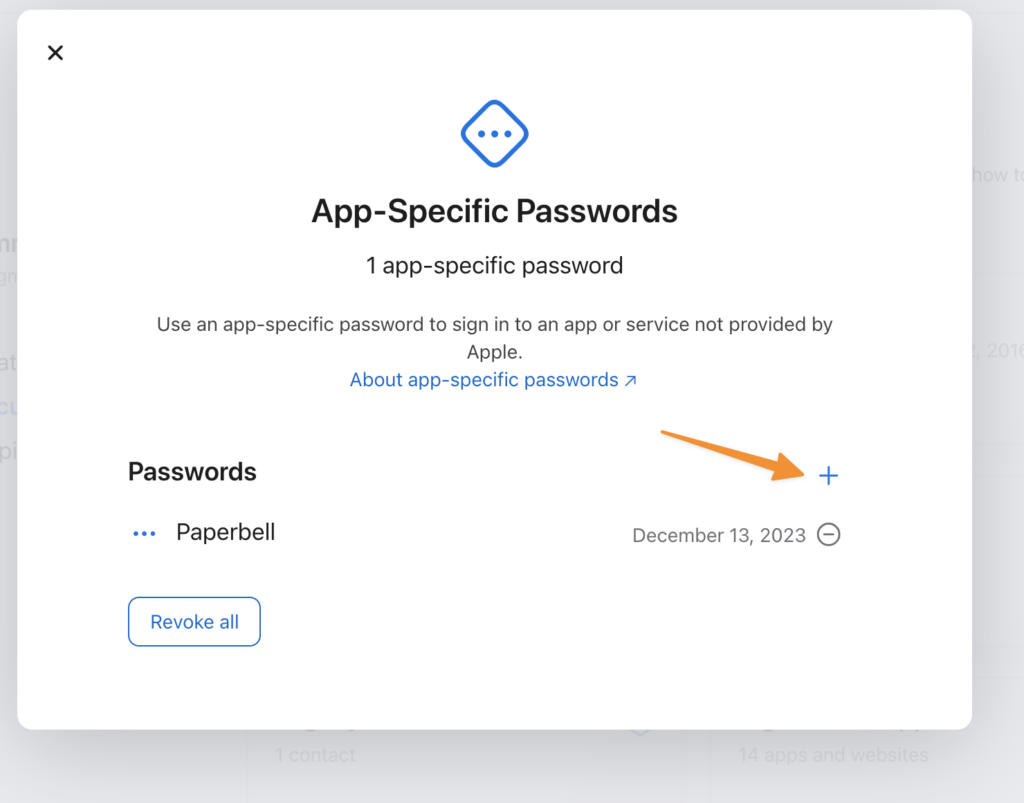
Step 3 (alternate) – Click the ✚ sign to create your new app-specific password for Paperbell.
Step 4 – Create a label for this password so you know which app it’s for. May we suggest “Paperbell”? Has a nice ring to it.
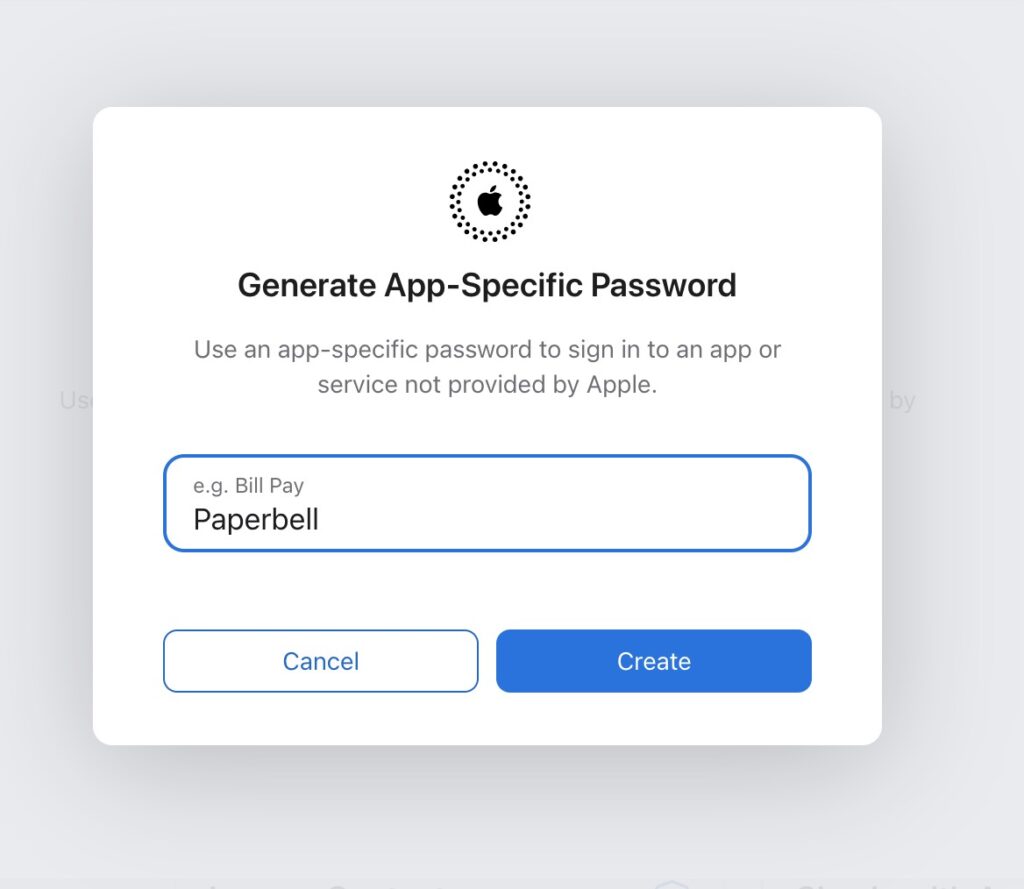
Enter the label name, and click the Create button.
Step 5 – Apple will create a new app-specific password. It will pop up in that window. Copy it! Take a screenshot, do whatever you need to do not to lose this password.
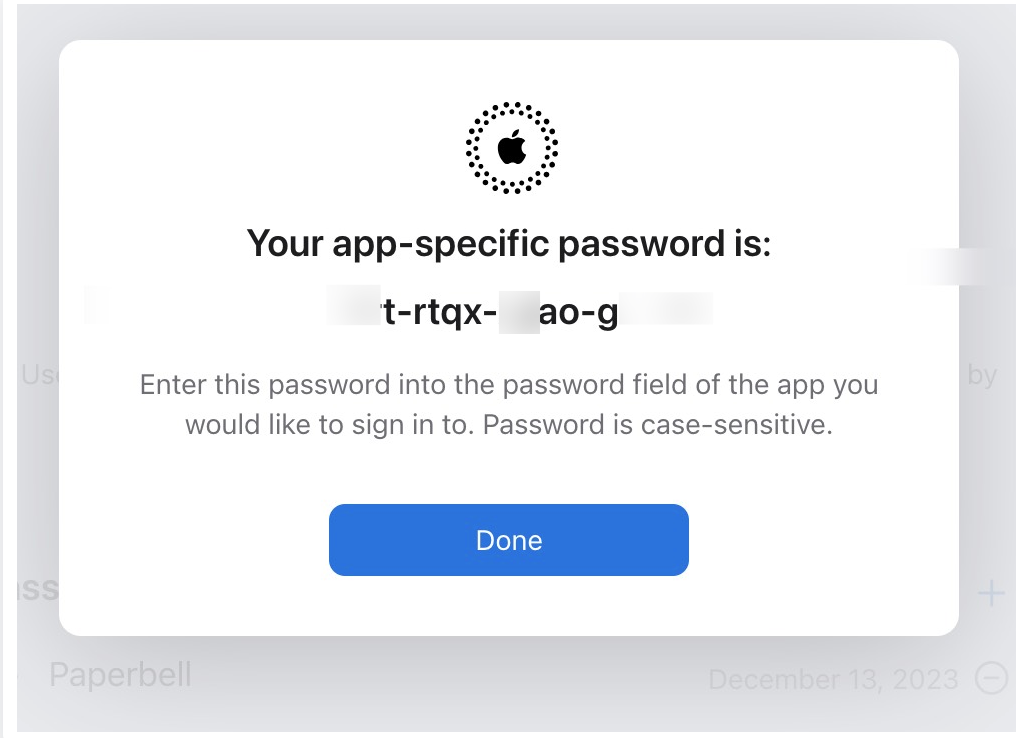
Copy that password! Check that you have that password copied, OK?
Step 6 – Head on over to your Paperbell settings and click on Calendar integration. Scroll down to the Apple calendar option and click the button to add an app-specific password.
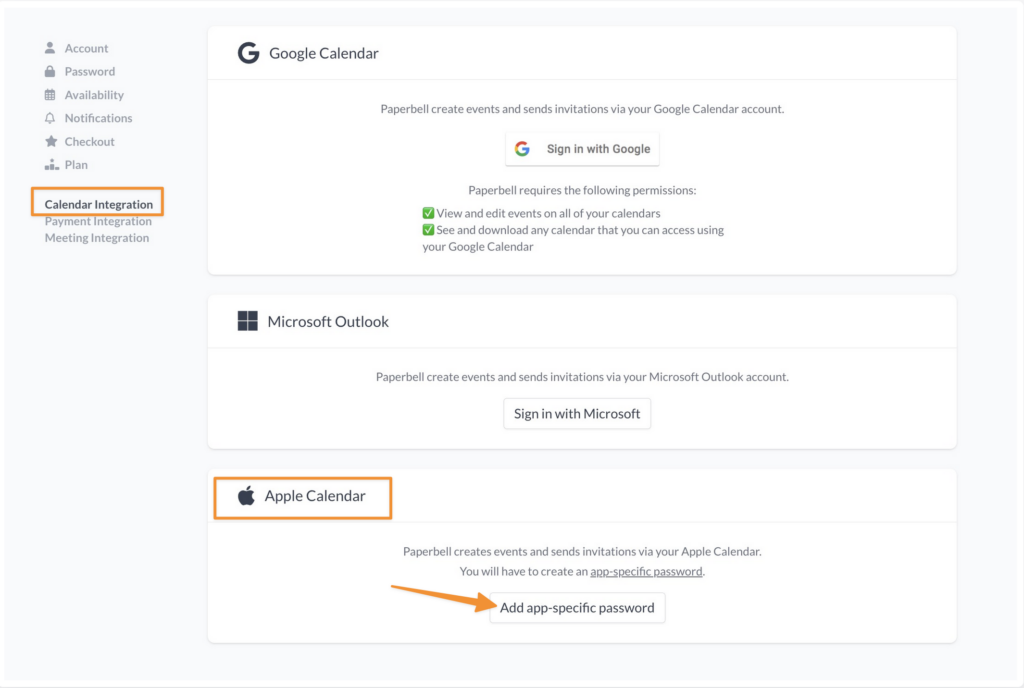
Step 7 – You’ll be prompted to enter your Apple ID and your brand-spankin-new app-specific password (that you diligently saved!):
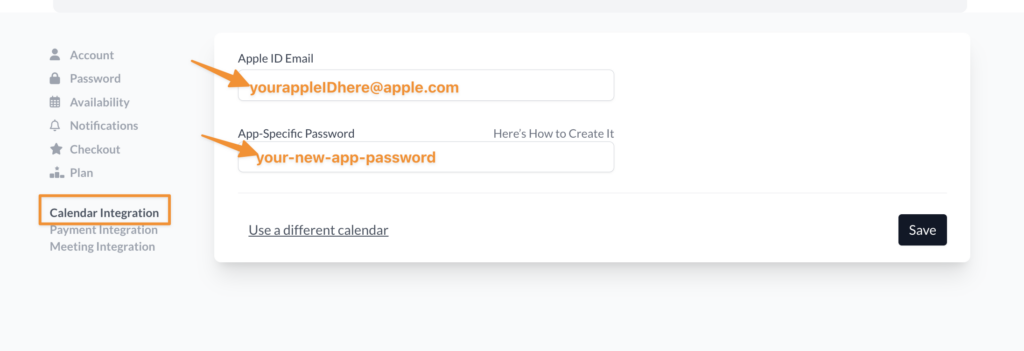
Hit Save, and voilà! Paperbell should be connected to your iCloud Apple calendar.
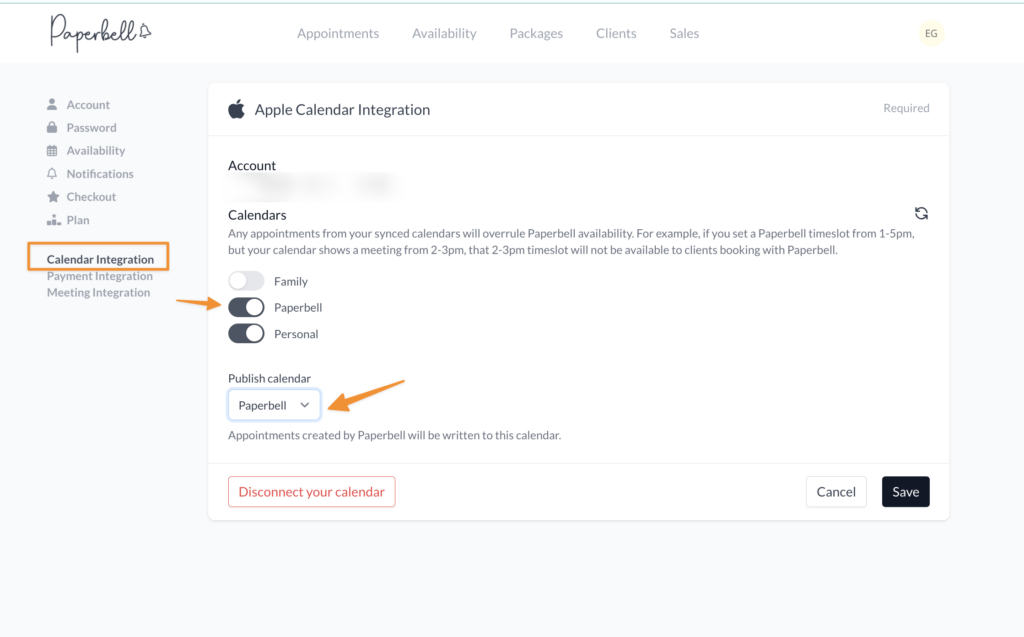
Step 8 – Toggle calendars off or on to sync with Paperbell. Choose from the dropdown menu which calendar you’d like your Paperbell events added to.
Oops! I didn’t save my new app-specific password.
It happens! You’ll revoke the original app-specific password for Paperbell, and start from the top by creating a new app-specific password (and we know you will save it this time!).
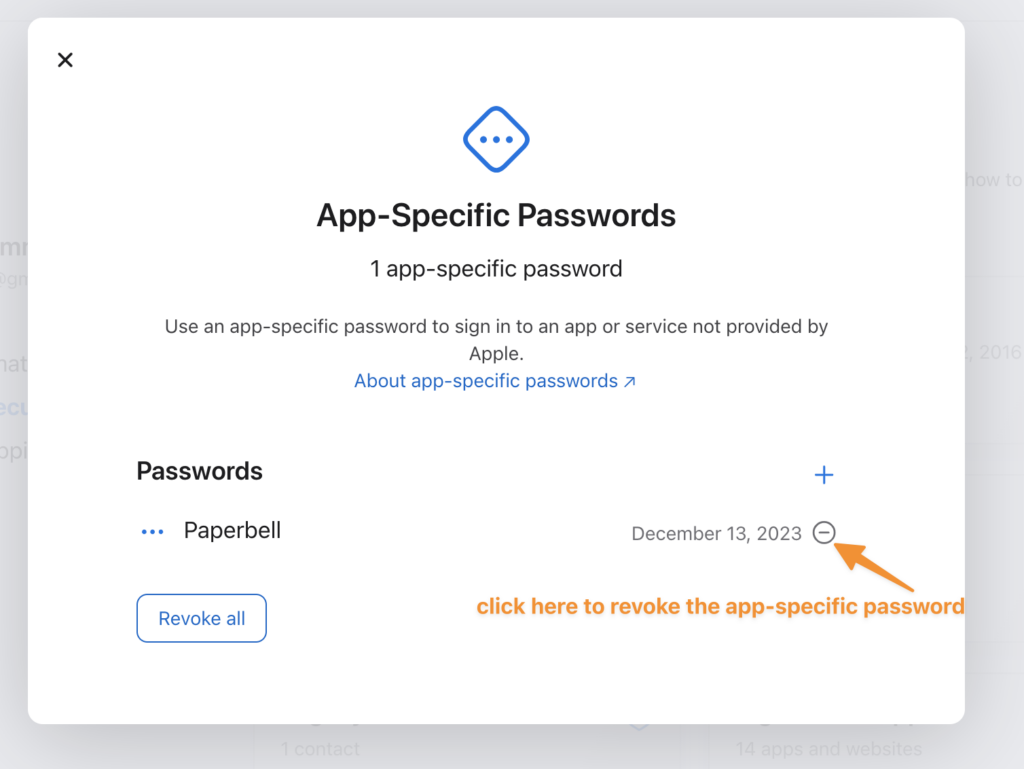
Revoke them all with the button, or click the ⊖ symbol to revoke only the new Paperbell app-specific password.
Then click the ✚ sign to create a new one.
But I use another calendar AND Google Cal!
No problem! You’ll still only integrate one of them with Paperbell — but you can sync up the other to your main calendar, and Paperbell will reflect the events in both calendars.
Here’s how to do that.
