You’ve just finished an amazing coaching session with a client. They’re excited, motivated, and ready to implement everything you discussed.
But two weeks later, they email you, asking where they can find the worksheet you sent, when their next session is scheduled, and whether they’ve paid their invoice yet.
Oh, and did I mention you’ve got ten more clients asking the same thing?
This type of admin work piles up fast when you’re a coach. That’s why so many of us struggle with the endless back-and-forth that comes with managing a coaching practice without proper systems in place.
The good news is that a well-designed coaching client portal that serves as a central hub for everything your clients need solves all of the problems.
That being said, most articles about client portals just throw a list of tools at you and call it a day. This guide goes deeper. I’ll walk through exactly how to create a coaching client portal that your clients will actually use… and that doesn’t want to make you rip your hair out.
What is a Coaching Client Portal?
A coaching client portal is a secure, centralized online space where your clients can access everything related to their coaching journey with you. Think of it as their personal coaching headquarters where they can:
- Book sessions
- Access resources
- View their progress
- Manage their account details, etc.
Unlike a regular website that’s designed to attract new coaching clients, a client portal is exclusively for people who are already working with you.
The core purpose of a coaching client portal is to create a seamless experience for your clients while reducing the administrative burden on you. Instead of fielding constant questions about schedules, payments, and resources, everything your clients need is available 24/7 in one organized location.
Key Features of Client Portals That Matter for Coaches
Not all client portal features are created equal. Here are the ones that actually make a difference in a coaching business:
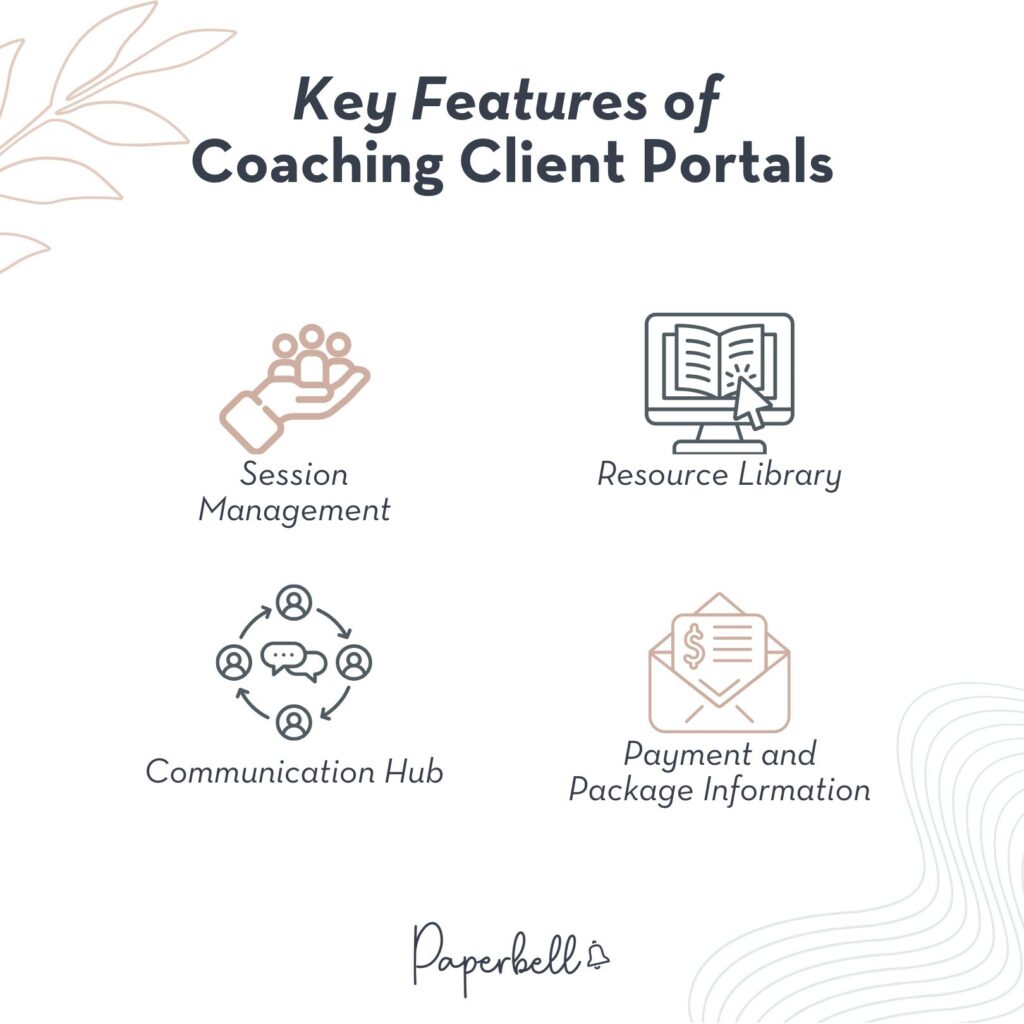
- Session Management: Clients can view upcoming appointments, reschedule when needed, and see their session history. This is especially important if you offer coaching packages with a set number of sessions.
- Resource Library: A dedicated space for worksheets, recordings, assignments, and any other materials you want to share. Clients never have to dig through their email to find that important document again.
- Communication Hub: A place for secure messaging, session notes, and updates that keeps all coaching-related communication in one place.
- Payment and Package Information: Clients can view their package details, see how many sessions they have remaining, and handle any billing questions without contacting you.
How Coaching Client Portals Differ from Basic Scheduling Tools
Here’s where many coaches get confused. They think a scheduling tool like Calendly, YouCanBookMe, or Acuity is enough to manage their client relationships.
But these basic scheduling tools only solve one small piece of the puzzle.
With basic scheduling tools, clients can book appointments, but that’s about it. They can’t log in to access their session notes, download resources you’ve shared, or see how many coaching sessions they have remaining in a package they purchased.
This creates several problems:
- You end up managing everything else manually
- You’re tracking session counts in a spreadsheet
- You send resources via email (which clients inevitably lose)
- You keep fielding questions about package details that should be easily accessible
But it also creates a disjointed experience for your clients. They might book through Calendly, receive session recordings via email, get invoices through a separate payment processor, and have to contact you directly to find out basic information about their coaching package.
A true coaching client portal eliminates these gaps by bringing everything together in one cohesive experience.
How to Create Your Own Coaching Client Portal
You don’t need to be a developer to create your own coaching portal. I’ll walk you through the step-by-step of building your own using a popular no-code tool: Notion.
Essential Features to Include in Your Coaching Client Portal
Before you start building, you need to decide which features are must-haves for your coaching practice. Here are the essentials:
- Client Dashboard: A clean overview page where clients can see their upcoming sessions, recent activity, and quick access to important resources.
- Session Scheduling: Integration with your calendar that allows clients to book, reschedule, and view their appointments without your involvement.
- Resource Management: Organized storage for all the materials you share with clients, with the ability to control when certain resources become available.
- Package Tracking: A clear display of what clients have purchased, how many sessions they’ve used, and what they still have access to.
Step-by-Step Setup Process Using Notion
If you’re comfortable with a DIY approach, Notion makes an excellent foundation for a coaching client portal template.
1. Create Your Client List Database
Start by setting up a place in Notion where you’ll keep your list of clients. You can think of it as a coaching CRM on top of a portal.
You can do this by adding a new page and selecting the Database option.
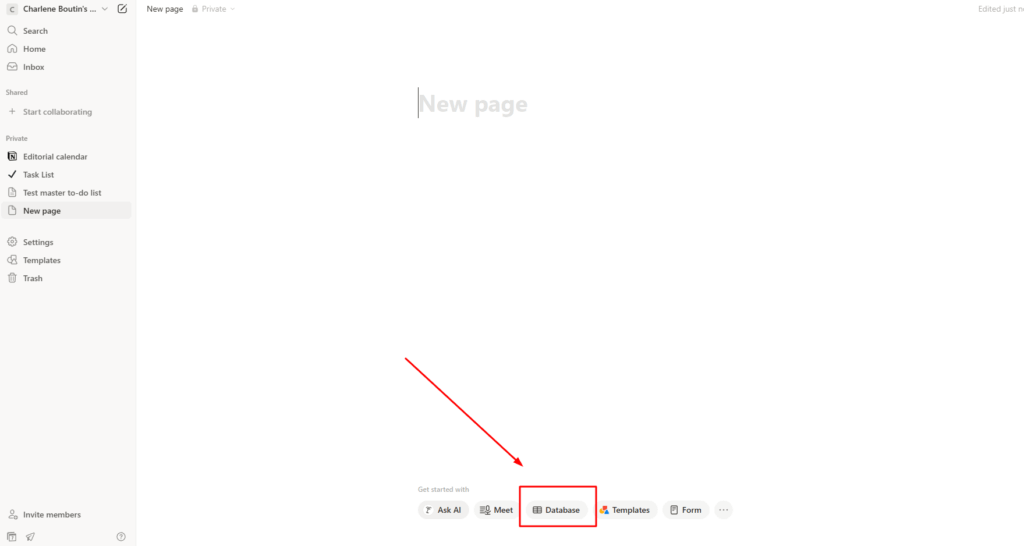
You can pick a template or go from scratch. In this case, I’ll start from scratch.
Name this Database “Client List” or something similar to stay organized.
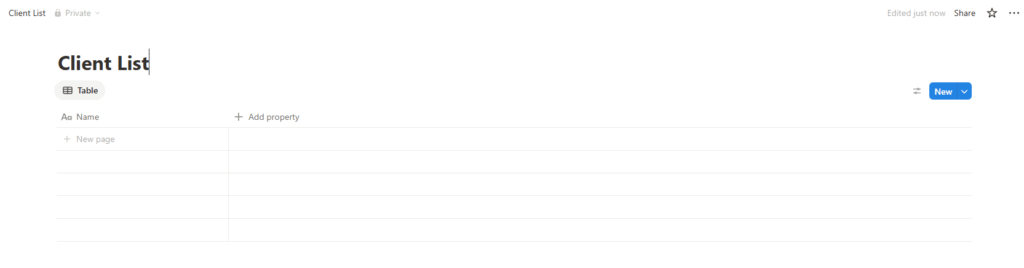
In the above screenshot, you can see the Add Property button. You can create properties you need to know about each client, such as:
- Client name
- Contact information
- Coaching package type
- Sessions remaining/client status
- Any other relevant details for your coaching business
The way databases work in Notion is that every new “row” you add – AKA, every new client – will generate a new page in your Notion workspace. So, when you add a new client, you can also open that client’s page:
2. Create Your Client Page Template
From within your database, click the blue New button in the right corner and select New Template. Your template will pop up; this is where you’ll design what each client sees when they access their portal.
Name this New Client Template. Feel free to create different templates for different coaching packages.
Next, you’ll need to create a Sub-Page within that template. This is so you’re able to share a separate page with your client, while also keeping your own notes private.
Hit “/” to open up the menu and select Page:

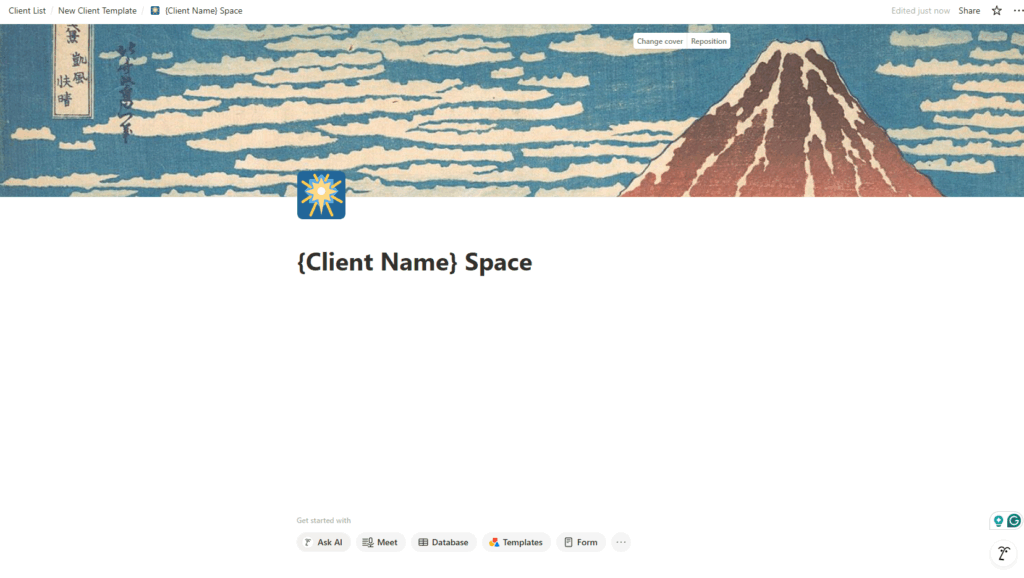
Name this new SubPage {Client Name} Space.
Then, this is where you get to have fun by customizing the page to make it look great! Add icons, change the cover picture, etc.
Go wild. Just remember to make it fit your coaching brand.
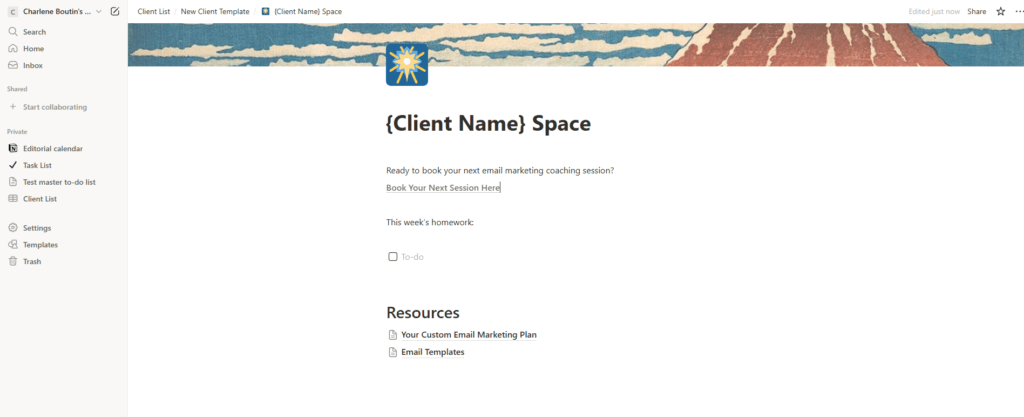
3. Set Up Your Client Resources
From here, the sky’s the limit. Notion is very customizable, which means you can add anything that fits your coaching program in this page, such as:
- Workbooks
- Templates
- More subpages with additional resources
- Links to replays of previous coaching sessions
- Links to your calendar booking tool
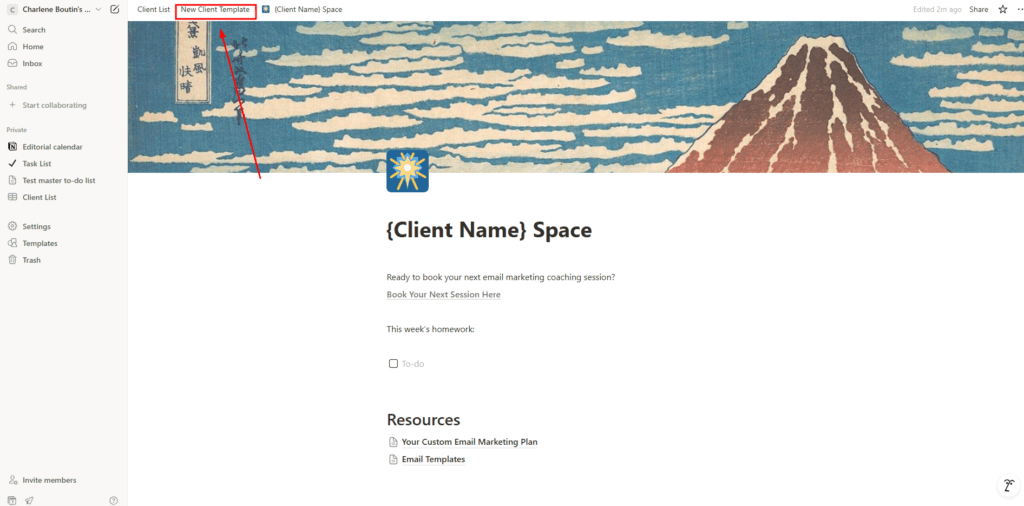
4. Customize Your Internal Client Notes Section
Once you’re happy with how your client-facing page looks, go back to the “internal” version of the client template. You can navigate templates in the upper area, like you would navigate any type of drive:
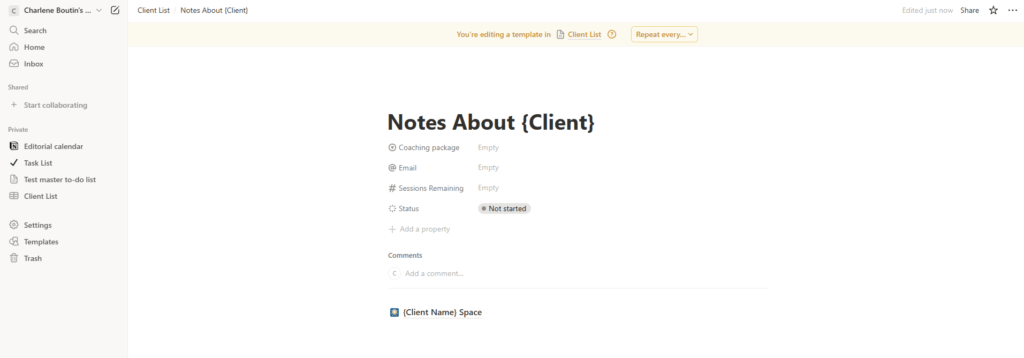
For this space, remember that nobody else will see it. You can always customize how it looks, but it will be for your sake only.
It can be as simple as just naming it “Notes About {Client}” and leaving it blank:
5. Set Your New Template As The Default
Back at the database level, click on the small arrow next to the blue New button and choose your newly created template as the default.
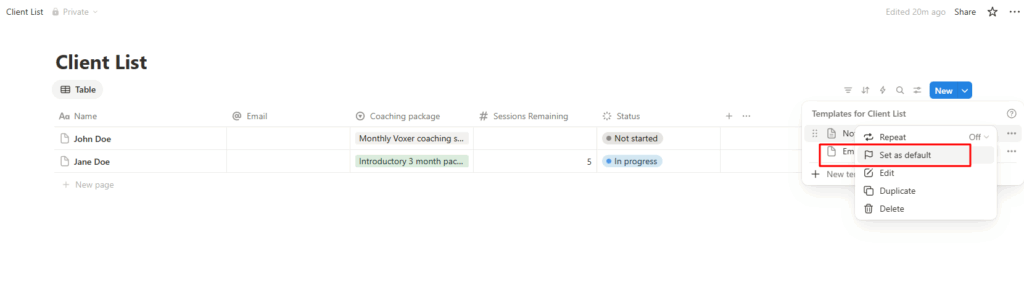
Now, whenever you onboard a new client, you can add them to this database.
To share the client-facing portal with your client, simply open the client-facing page you just created.
Make sure to rename it adequately. Then, hit the Share button and invite your client via email.
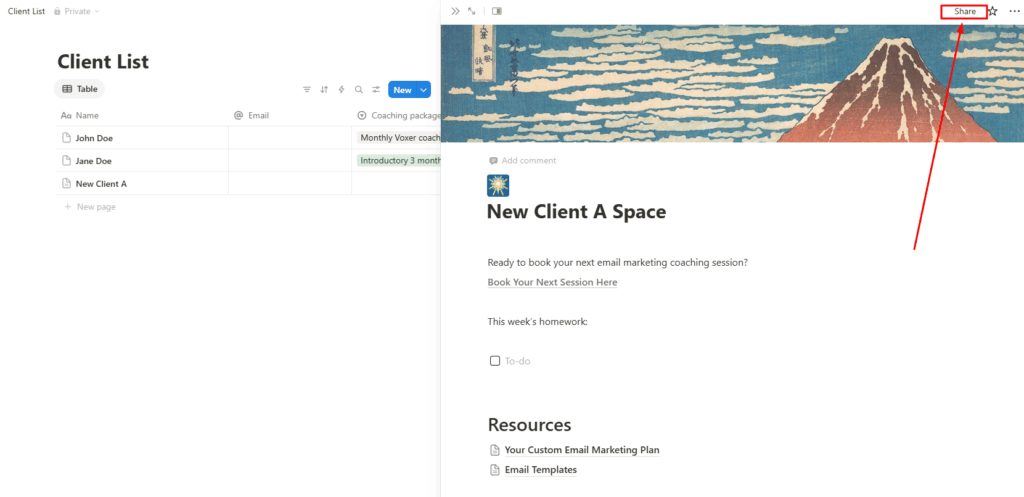
Remember to set your client’s permission to only access what you’ve shared with them, and not the whole workspace!
How to Use Paperbell as Your Coaching Client Portal
Building your own portal on Notion does give you complete control. However, it also requires ongoing maintenance and technical know-how.
There’s also a huge amount of choice overload. Sometimes, too much isn’t better.
Personally, I’d rather spend more time finding and coaching my clients.
Paperbell offers a simpler solution by providing everything you need for a coaching client portal right out of the box.
Here’s exactly how to set up your coaching client portal using Paperbell.
1. Get Your Free Paperbell Account
Start by signing up for a free Paperbell account.
The moment you complete registration, Paperbell automatically creates a professional coaching website with a built-in client portal system.
No technical setup required.
2. Add Your Branding Elements
Navigate to the Website Editor from your top menu. Here you can customize how your coaching portal looks and feels to match your brand.
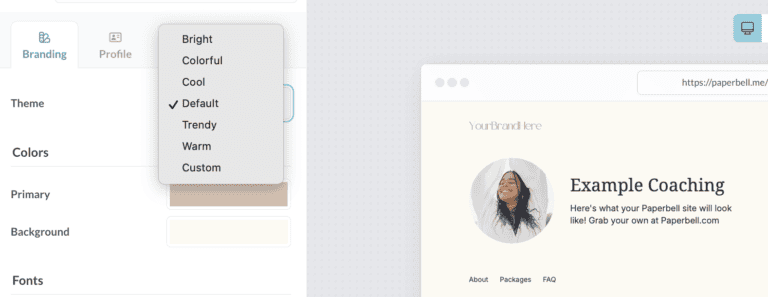
Paperbell offers several professional themes designed specifically for coaches. Pick the one that best matches your style, and you’ll see the colors and layout update instantly.
Next, still under the branding section, customize your fonts, and then your primary color (which appears on buttons and links) and background color.
You can either pick from the color palette or enter specific hex codes if you have exact brand colors.
Finally, add the name of your website and a quick tagline and About Me text. Here’s where these elements will show up on your website:
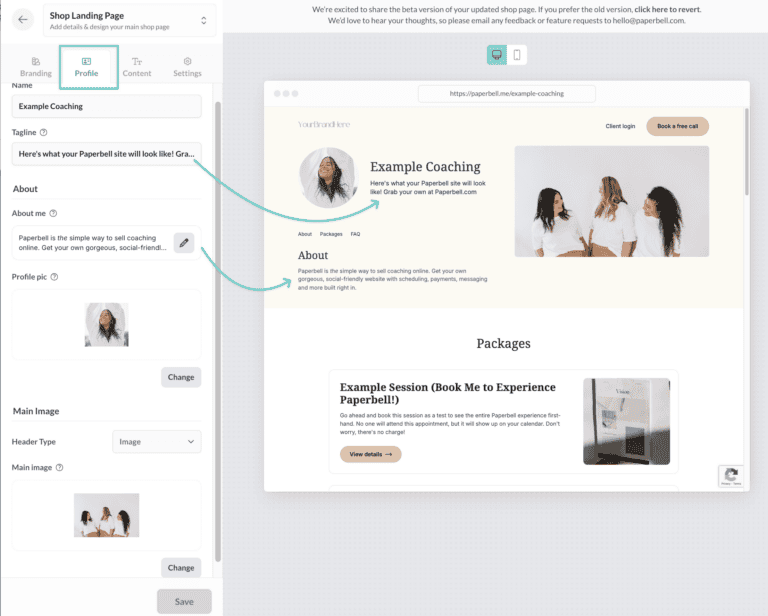
The profile section is also where you can add a headshot as well as a main image or embedded video.
3. Create Your Coaching Packages
This is where the magic happens. Each coaching package you create automatically gets its own landing page and becomes part of your client portal experience.
You’ll be able to rearrange how the packages appear and add other elements to your website later, but for now, navigate out of the website editor and click Packages at the top of the Paperbell menu.
Click Add New. You can choose from three package types, or select a template to get going faster:
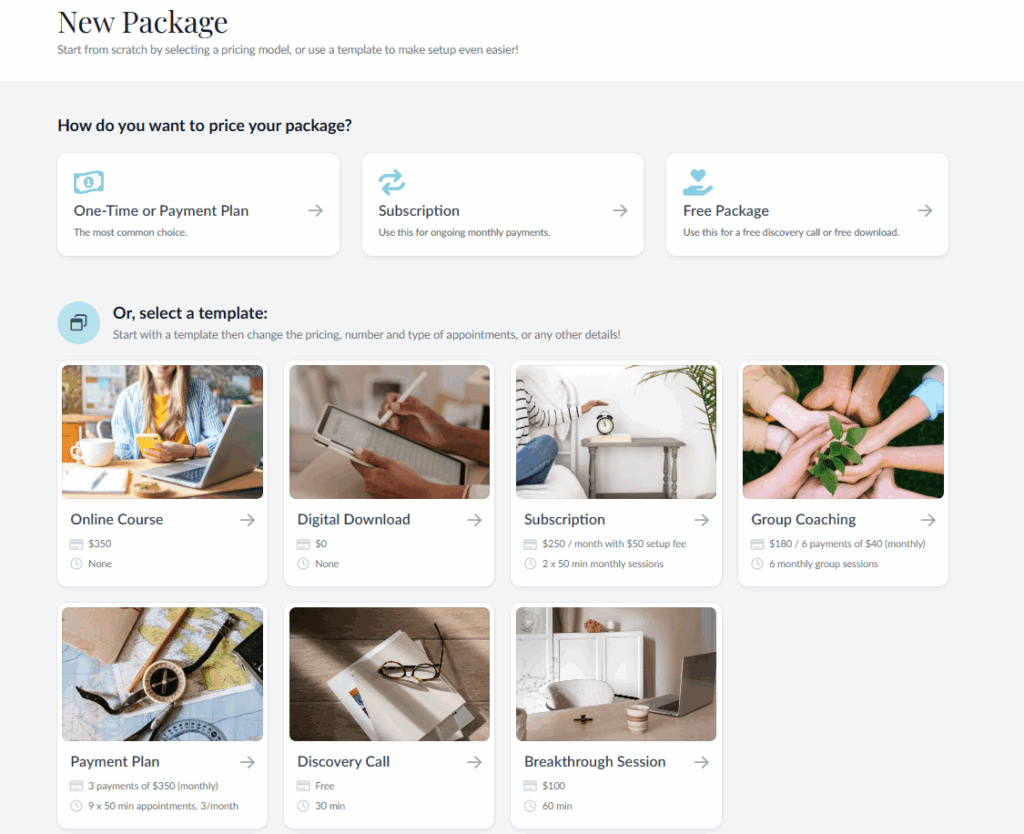
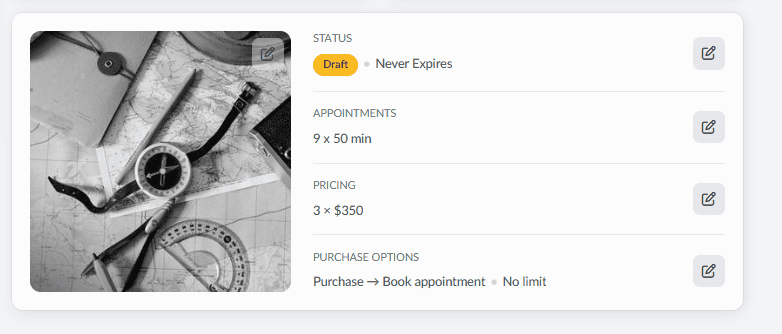
In this example, I picked the Payment Plan package, which contains several coaching appointments.
At this point, you can customize:
- How many sessions are included
- The length of each session
- Your pricing, including how pricing plans are set up (or whether you’re offering a subscription or full-pay plan instead)
- Whether any group sessions are part of the package
You can also choose whether clients book their first appointment and then pay, or pay first and then book. This flexibility lets you create the experience that works best for your coaching style.
If you have a coaching agreement or service contract, upload it to the Contract section. Paperbell automatically converts it into a signable document that clients complete before booking.
If you’re creating a package for a free discovery session, simply omit payments and contracts. The system creates a simple booking flow directly into your calendar.
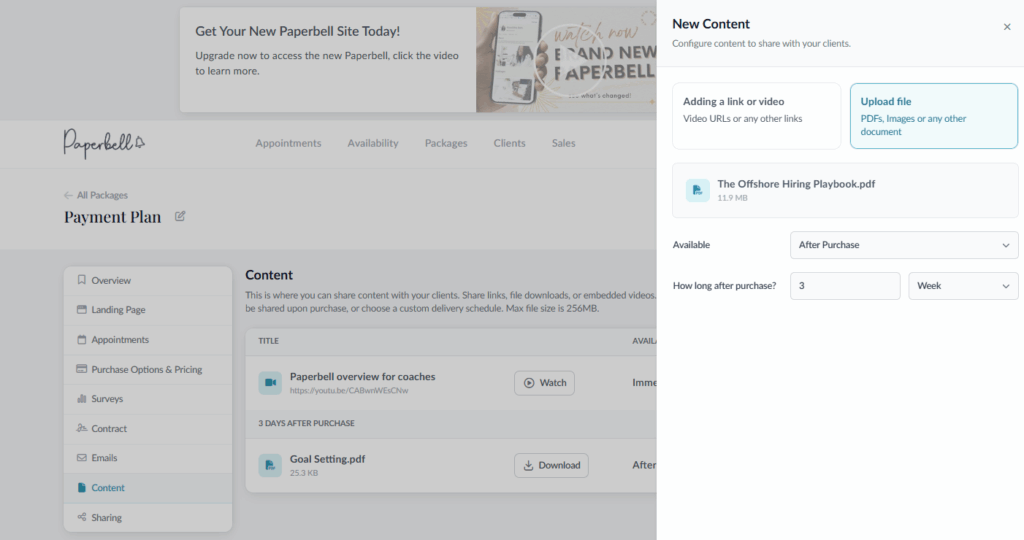
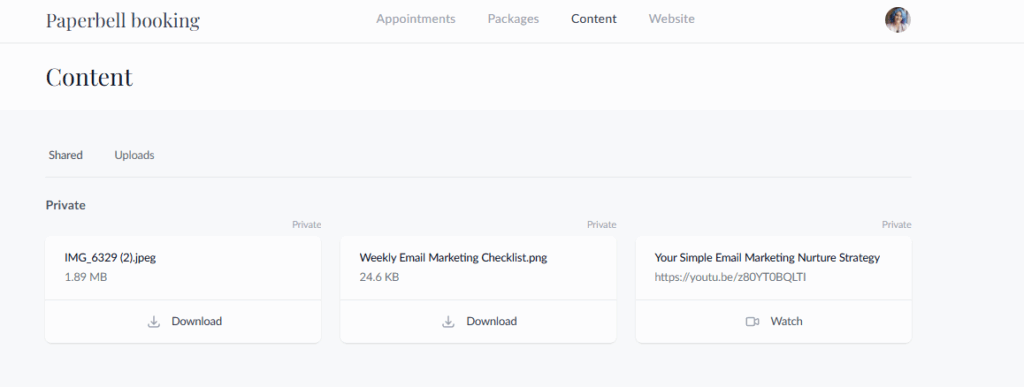
4. Add Digital Content and Resources
Your client portal really shines when you add valuable resources that clients can access anytime.
Add any:
- Digital downloads
- Worksheets
- Replays of previous sessions
- Any other resources you want to share with clients
You can also choose whether clients get immediate access to all content immediately upon purchase, or set up a custom delivery schedule.
For example, if you have a 12-week coaching program with weekly workbooks, you can set each workbook to become available after each session occurs.
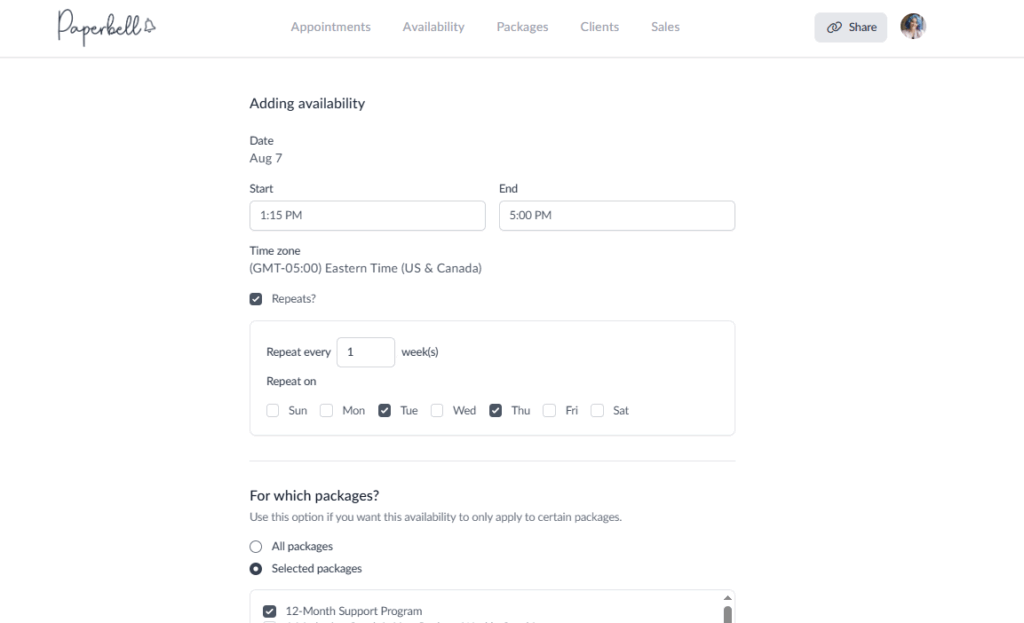
5. Customize Your Availability
Set your coaching schedule so clients can book sessions when you’re actually available in the Availability menu at the top section.
You can set different availability for different types of coaching packages. Maybe you offer discovery sessions on weekdays but intensive packages only on certain days.
But you can also establish your overall coaching hours, time zone, and any buffer time you need between sessions.
6. Automate Client Communication
Set up automated emails that enhance the client experience without requiring your constant attention.
In your Package, Paperbell lets you create automated emails for several key moments, including:
- Purchase confirmation
- Appointment reminders
- Reminders to book their next session
- Group session notifications
- Final appointment warnings
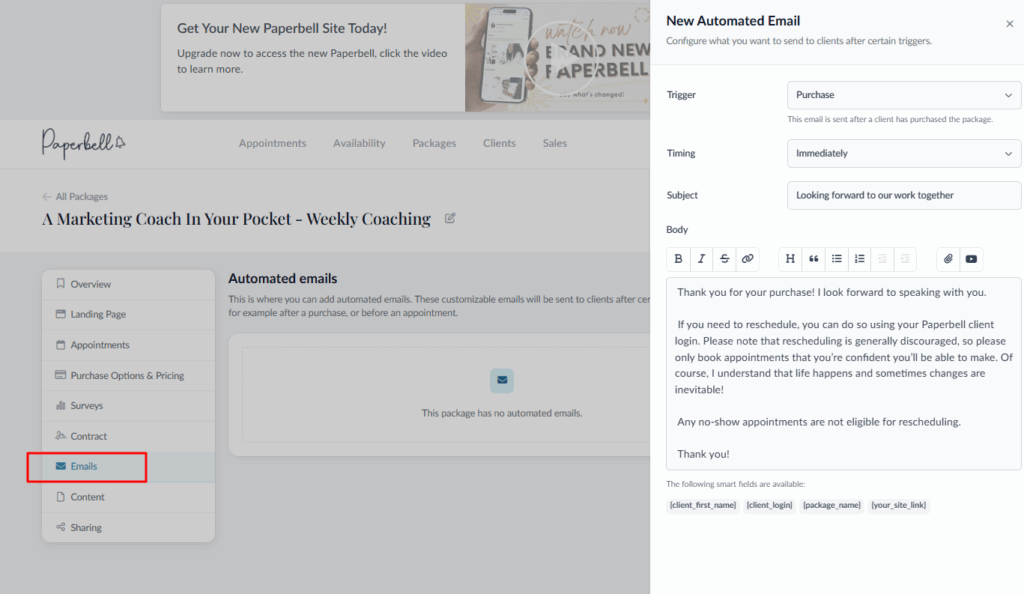
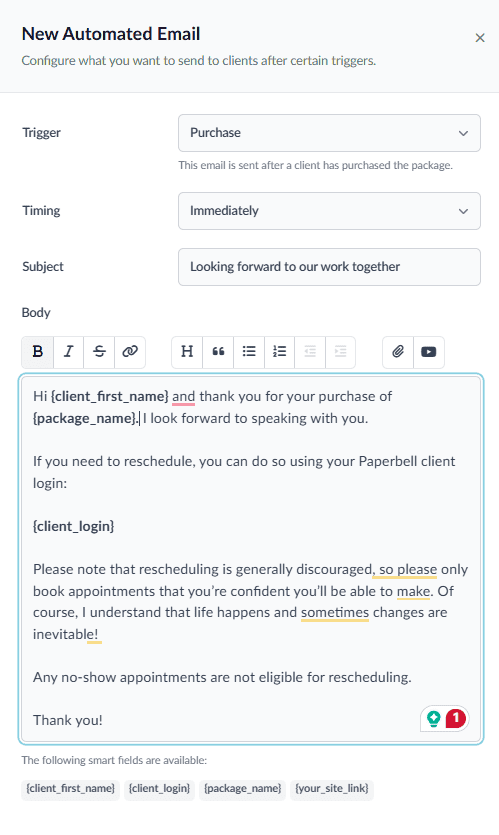
For each email, you can customize exactly when it goes out. For example, send a reminder email 24 hours before an appointment or a check-in email three days after a session.
In any of these emails, you can use smart fields to include your client’s personal login link to their portal, making it easy for them to access their account whenever they need it.
Your Client Portal in Action
Once everything is set up, here’s what your clients experience. When they log into their portal using their unique link, clients can:
- Schedule or reschedule appointments
- Access all the content you’ve shared with them, including signed contracts and digital downloads
- Complete any surveys or intake questionnaires you’ve created
- Purchase additional packages if you offer them
- Upload their own files to share with you
That’s it! Your coaching client portal is ready to simplify your practice and create an amazing experience for your clients.
Coaching Client Portal Templates and Examples
Now that you understand how to build your own portal, let’s look at some real-world coaching client portal examples and templates that can inspire your own setup.
Paperbell Example Coaching Website and Portal
If you want to see Paperbell in action, there’s no easier way than to check out the example coaching site.
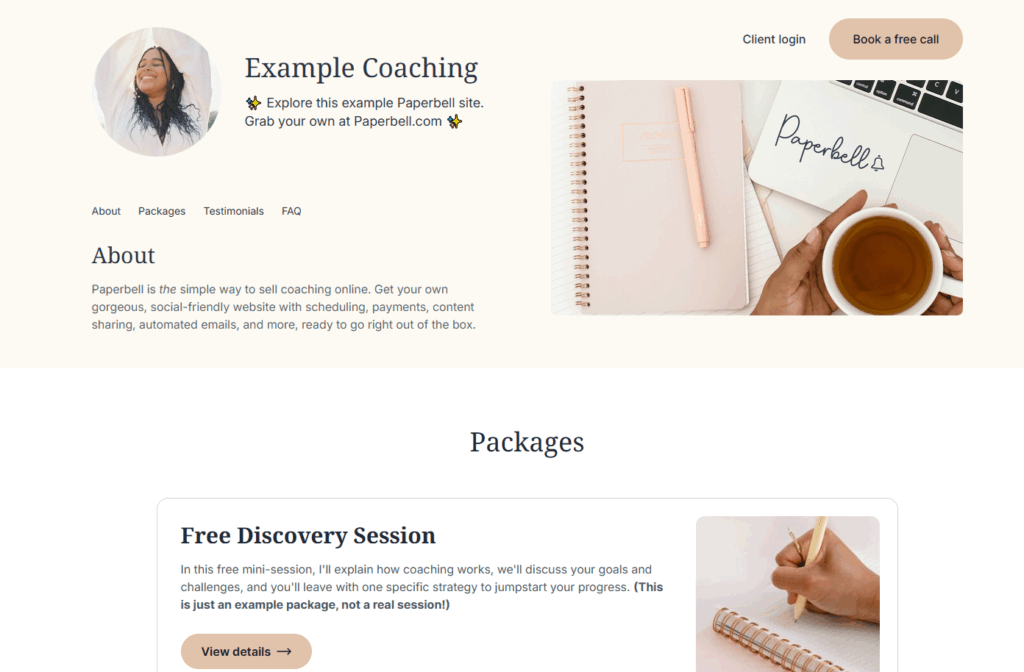
You can see the branding in action, as well as example packages. And if you want to test the booking process, you can even use the calendar for real – but don’t worry, it’s not a real appointment!
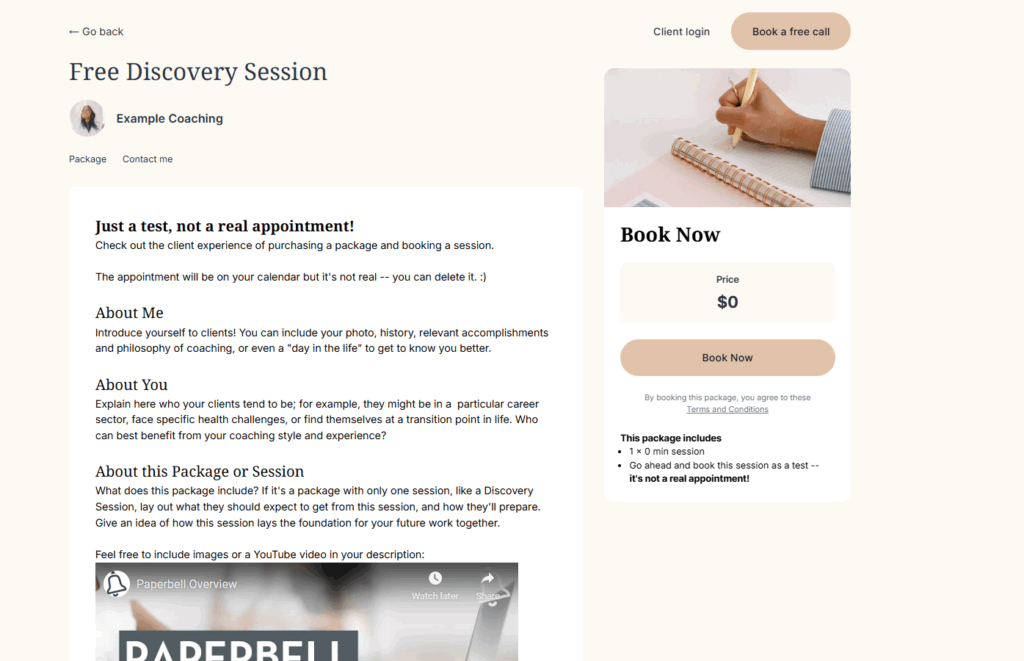
This will allow you to see the client portal in action, though.
Notion Client Portal for Coaches by Knowledge Unicorn
For those who prefer Notion, some templates are available. This one, designed for coaches, includes a calendar view and course modules.
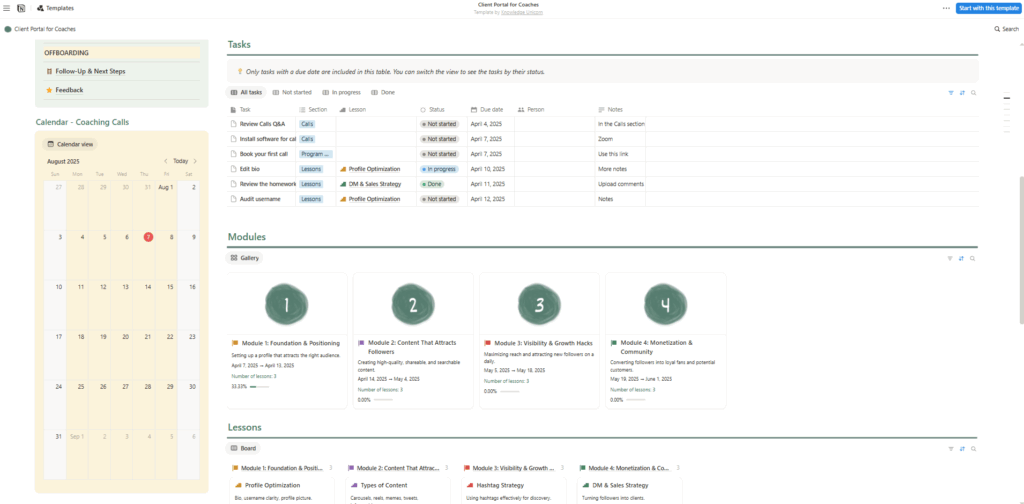
It’s a great example of what a more robust knowledge base can look like compared to the one I created for you in Notion above.
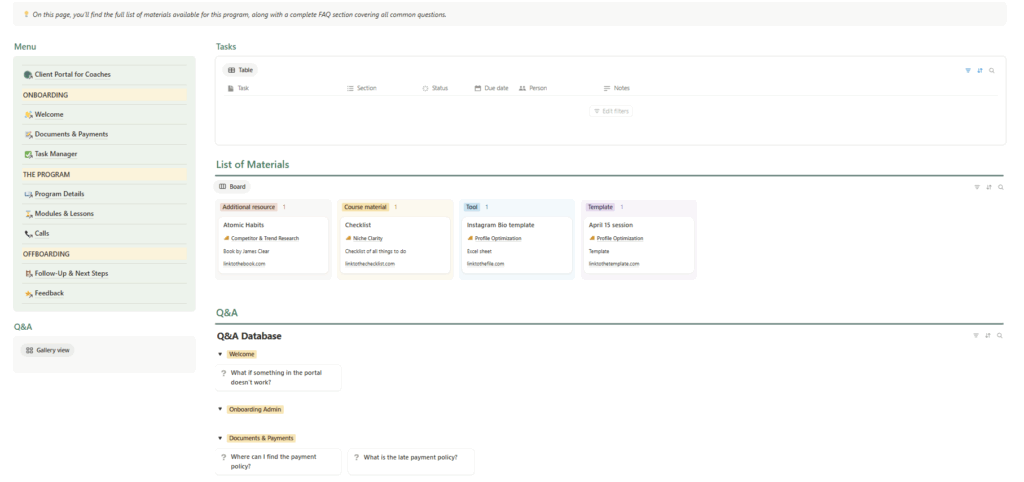
It’s pretty neat, although all the features and pages will most likely be overkill for the majority of coaches.
FAQ About Coaching Client Portals
What is a coaching portal?
A coaching portal is a secure online space where your clients can access everything related to their coaching experience with you. It includes scheduling, resources, progress tracking, and communication tools all in one place.
Do I need technical skills to create a client portal?
Not necessarily. While you can build one yourself using tools like Notion, platforms like Paperbell create a complete client portal automatically when you sign up, requiring no technical knowledge.
How much should I charge clients for portal access?
Most coaches include portal access as part of their coaching packages rather than charging separately. The portal enhances your service delivery, but shouldn’t be an additional revenue stream.
What’s the difference between a client portal and a website?
Your website attracts new clients, while a client portal serves existing clients. Portals are private, personalized spaces with login access, whereas websites are public-facing marketing tools.
Transform Your Coaching Practice with a Professional Client Portal
A well-designed client portal eliminates so many issues that plague coaches, such as:
- Endless email exchanges
- No-shows and forgotten appointments
- Lost materials and resources
- Clients needing to be hand-held all the time
Plus, it frees up your time to focus on what you do best: coaching.
With Paperbell, you get a complete coaching client portal along with your website, scheduling system, payment processing, and automated workflows all in one platform. There’s no need to juggle multiple tools or pay for additional portal software.
Ready to see how easy it can be? Get your free Paperbell account and have your coaching client portal up and running in minutes, not weeks.