Your Paperbell site is the shareable home to all of your active packages. (It does not include any packages you’ve marked invite-only or paused.)
You can add your logo and beautiful images, and customize your site to match your brand colors. 🌈
Edit your site by clicking the Website Editor tab at the top of your screen.

Read on to learn about your options in each section of your Paperbell site.
Branding
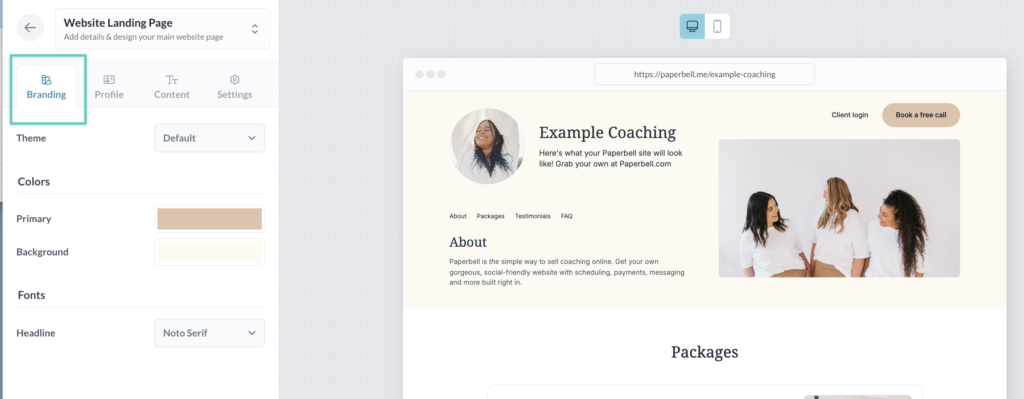
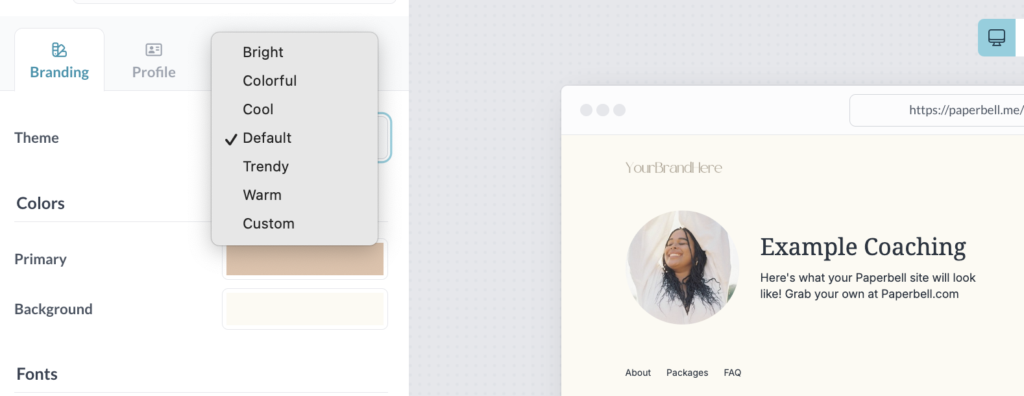
Play around with themes, colors, and fonts by choosing from the dropdown menus.
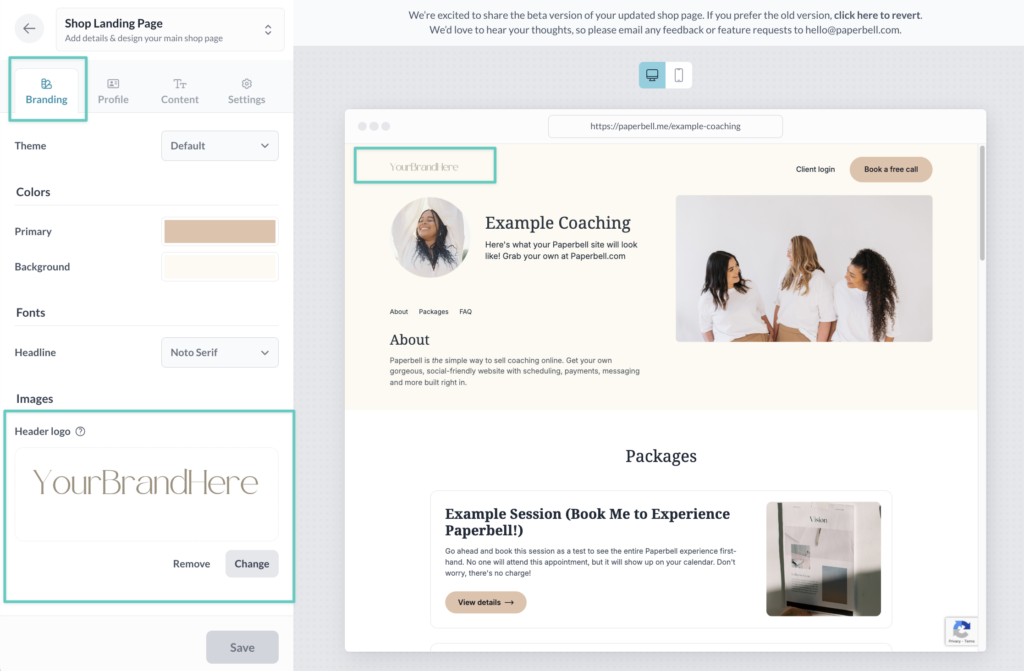
Don’t forget to upload your logo!
Add your custom brand across the entire Paperbell checkout experience. You can read more about that right here.
For best results:
- Your logo should be a horizontal image, sized to 150 px wide x 40 px high
- Use our Canva template to make sure you’ve got the right size
- Crop the file as close as possible to the image itself, without bordering white space
- Save as a PNG file
Profile
Explain who you are, what your focus is, and everything you bring as a coach!
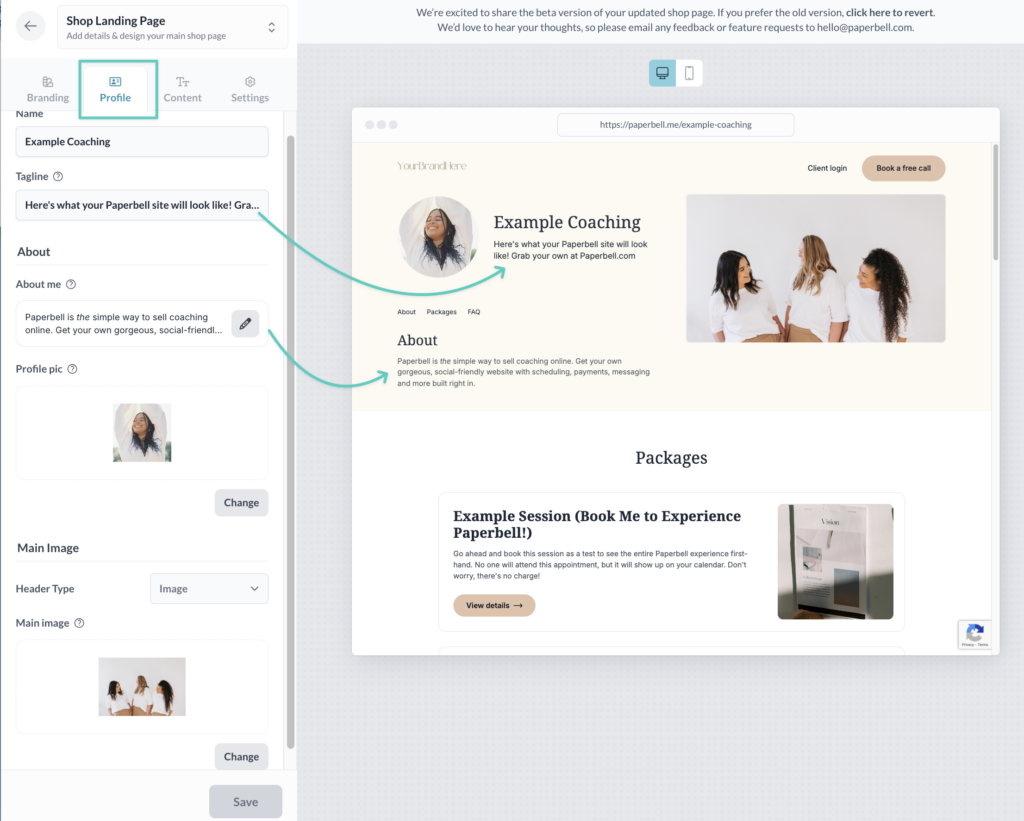
Enter your (or your business’s) Name in this section. You can also add a tagline that shares your mission.
About Me
In About Me, feel free to share your background, motivation, and details to inspire potential clients.
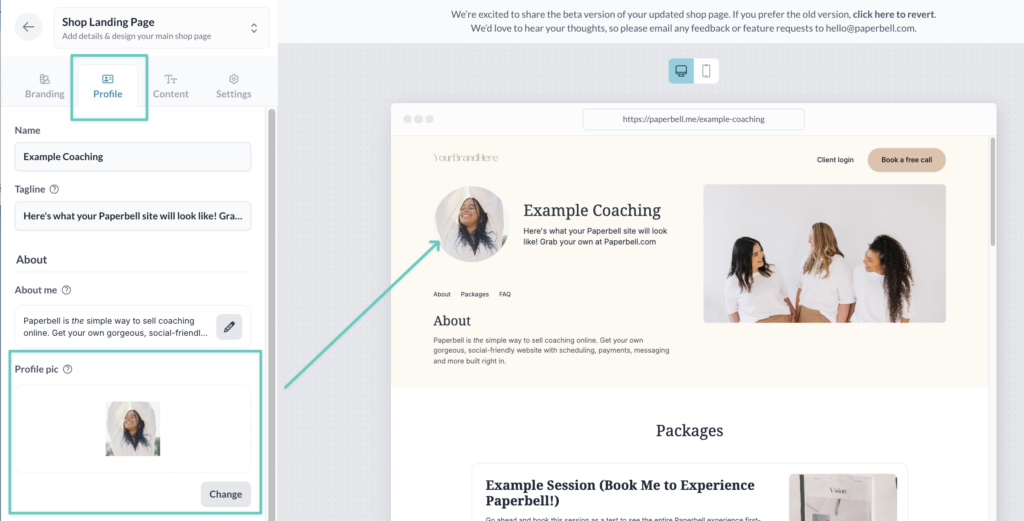
Profile Pic
Your profile pic sits next to your business name and tagline.
To get the best results for your profile pic:
- Size it to a square 250px wide x 250px high
- Use our template in Canva
- Save as a PNG
Main Image
Add an image or a video to your site header. First choose the type from the dropdown menu:
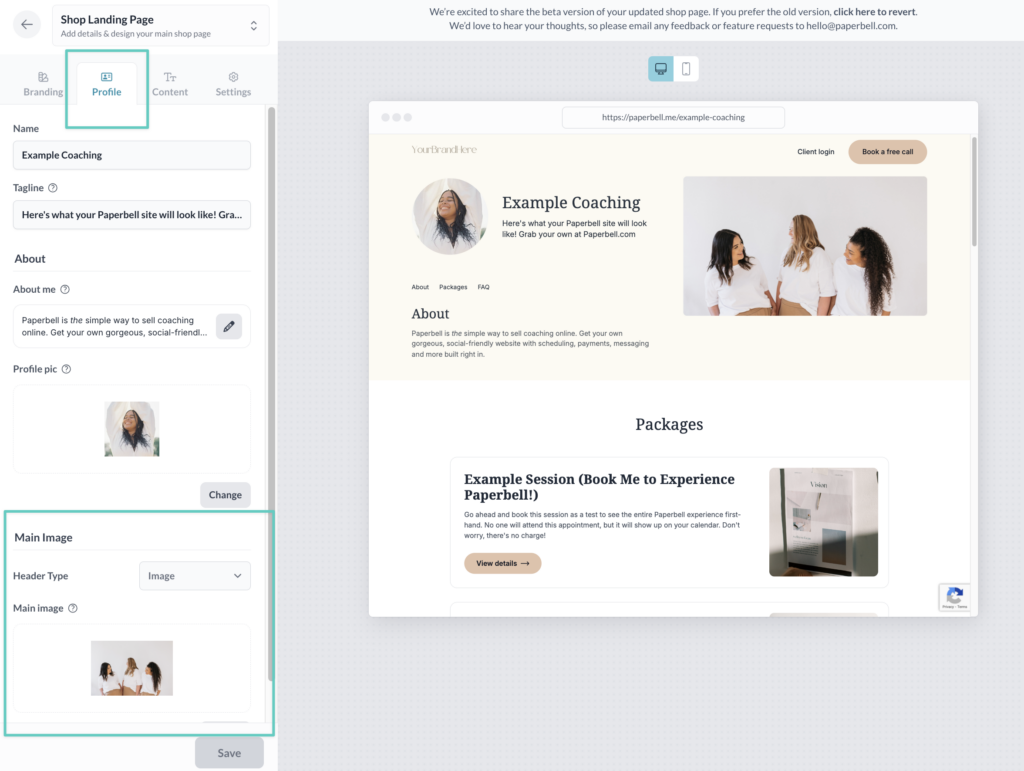
For the best looking main image:
- Resize it to 800px wide x 450 px high
- Use our Canva template
- Save it as a PNG file
If you’d like a video here, choose “Video” from the dropdown menu, and add the URL for your YouTube video.
Content
Lots of good stuff in your Content tab!
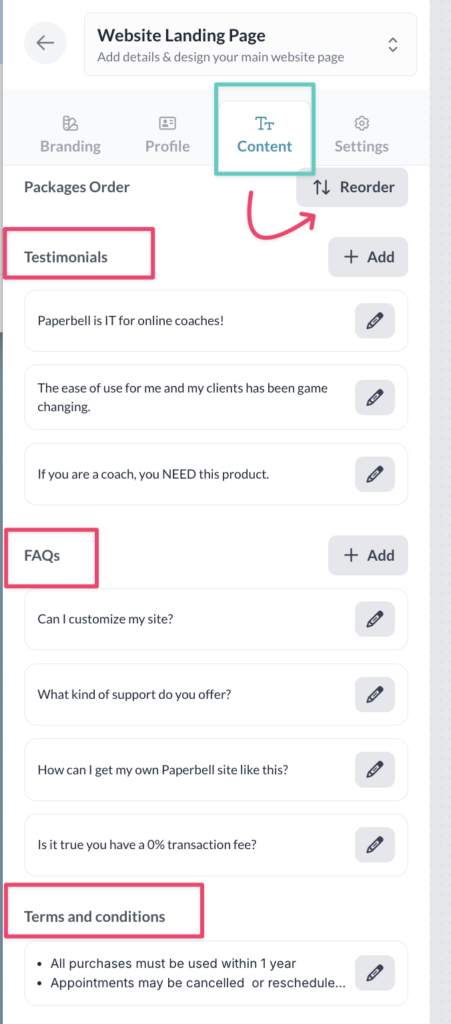
- Rearrange how packages are ordered
- Brag on yourself by adding testimonials
- Anticipate and answer your clients’ questions with FAQs
- Add terms & conditions
Reorder Packages
Click the Reorder button to reorganize how your active packages display on your site.
Testimonials, FAQs, Terms & Conditions
Add all of the above by clicking the +Add button, and the pencil icon to edit what’s already there.
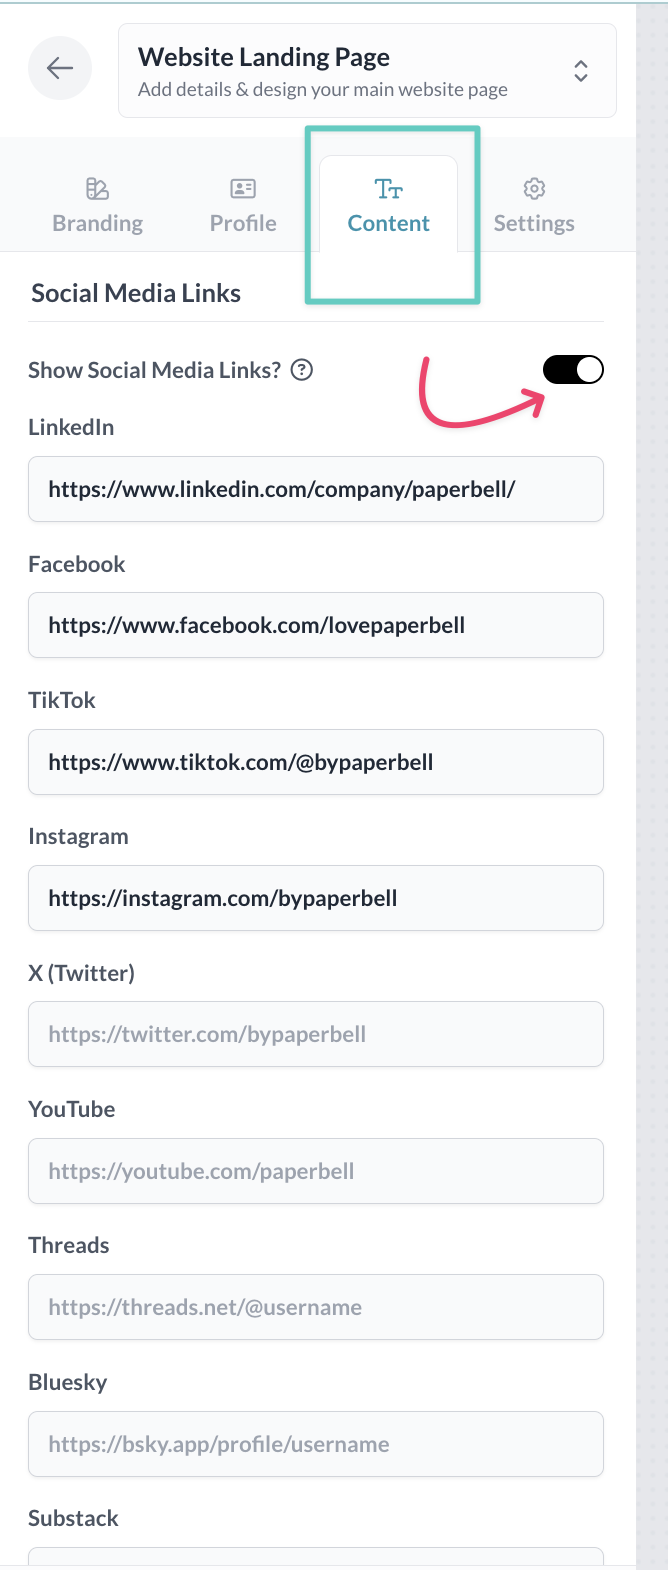
Social media links
Scroll down to pop in your social media links for LinkedIn, Facebook, TikTok, Instagram, X(Twitter), YouTube, Threads, Bluesky, and Substack.
Promoted Package
You can also spotlight a particular package on your site by choosing to show a Promoted Package:
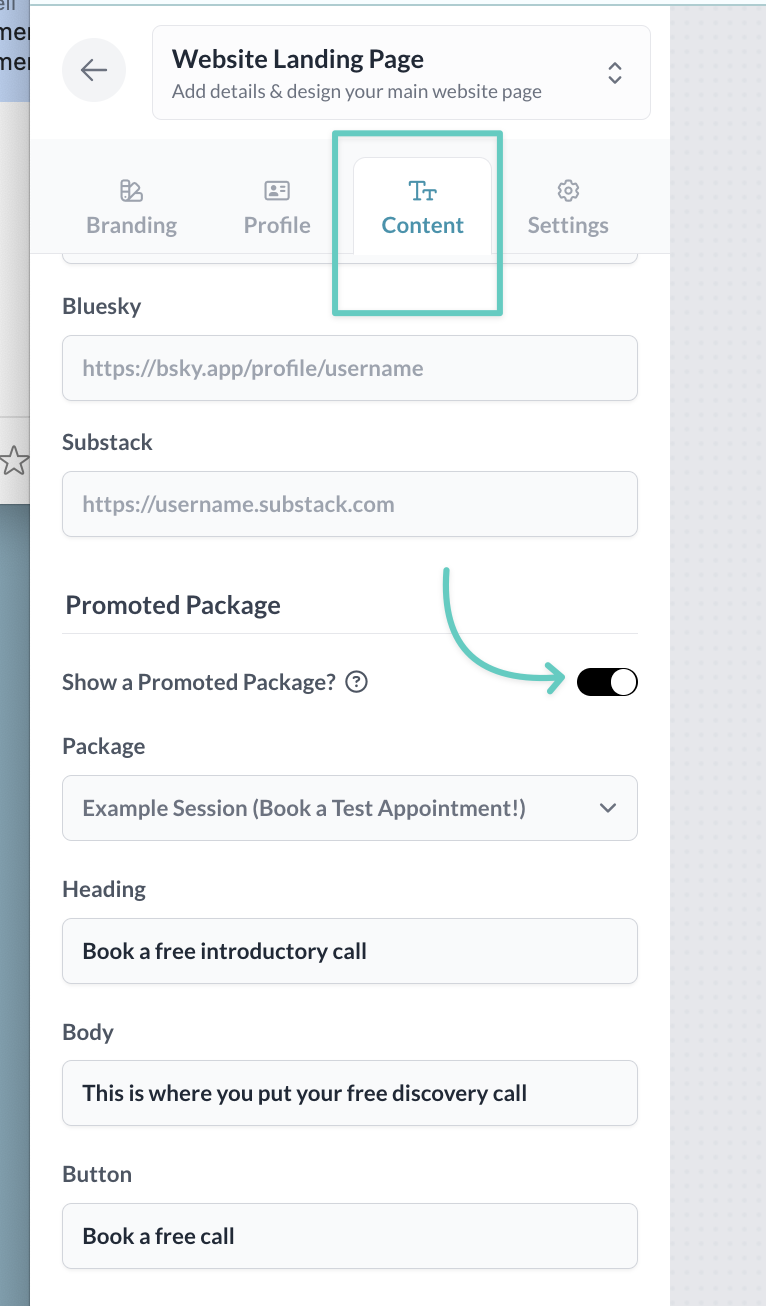
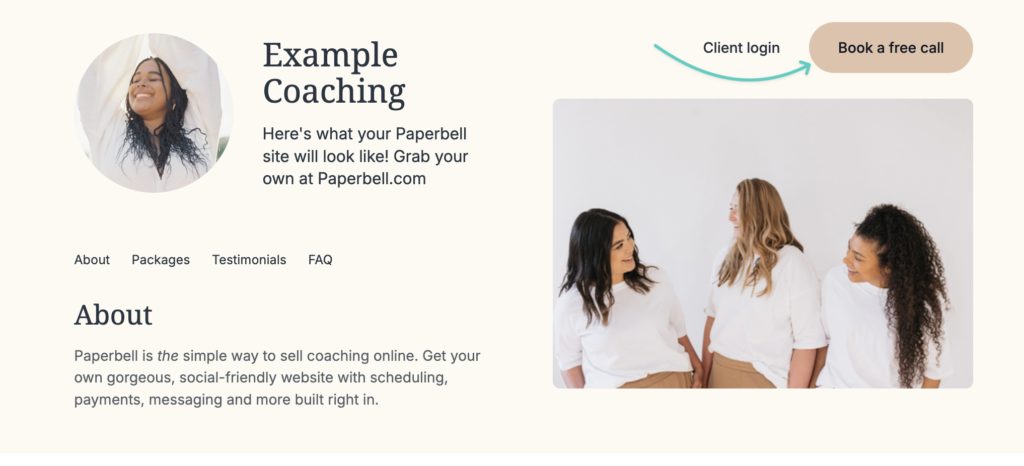
You’ll be able to edit the button text, and link to whichever package you like.
(Psst — it’s a perfect way to highlight your Discovery Call package.)
Mailing List
Toggle on the mailing list to collect email addresses of prospects.
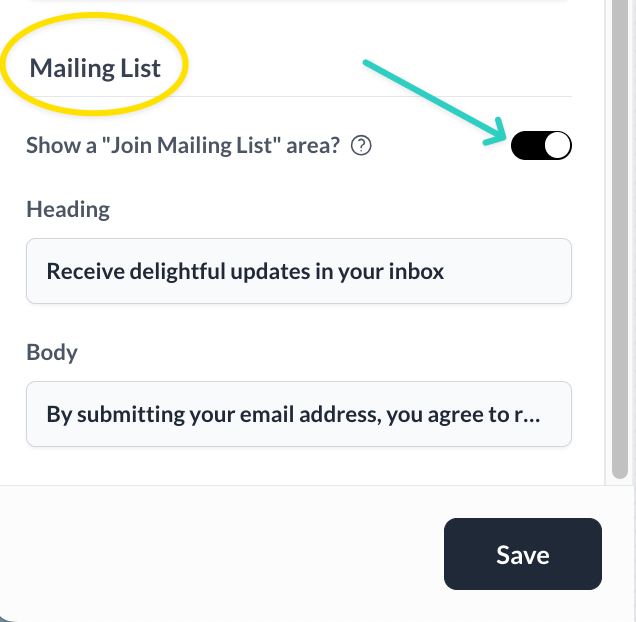
You can download your list of opt-in addresses in Paperbell, and use that file in the marketing or newsletter software you use.
Settings
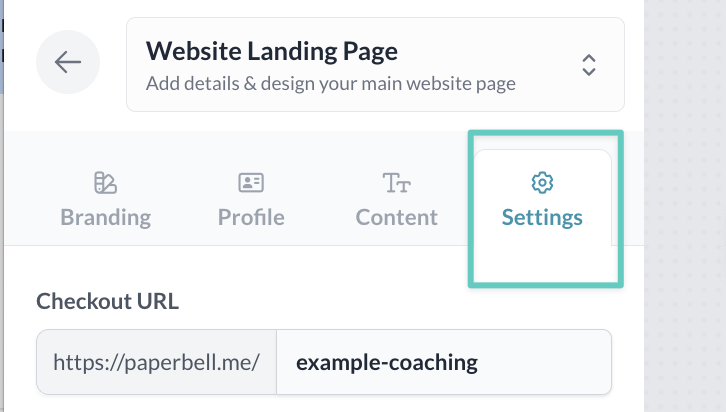
Checkout URL
This is your website’s address!
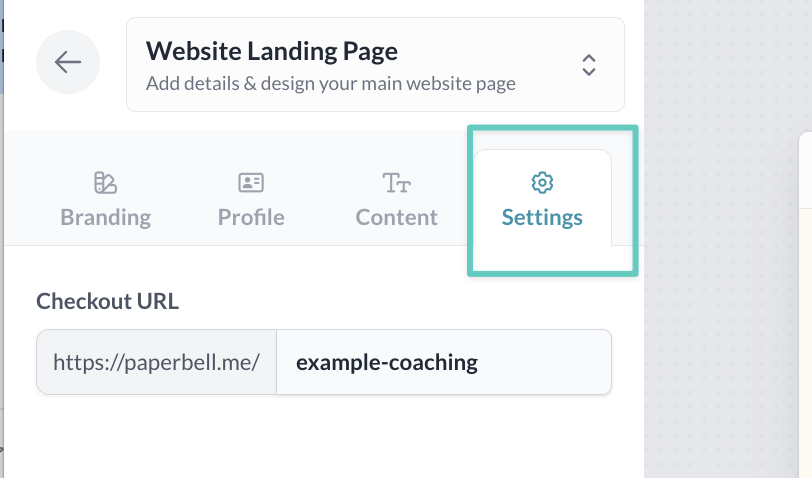
Your Paperbell site URL is automatically created as https://paperbell.me/[your-name], but you can change that [your-name] part to whatever you like (as long as no one else has it already)!
Want to use your own domain? Learn how here.
🤢 When would you NOT want to use your Paperbell site?
Sometimes you don’t want clients to have a poke around — you want to direct them to one specific package. In that case, you can send them to the landing page for that package.
If you never want clients to be able to see everything you offer, make all of your packages invite-only. Or you may want to put only your free discovery call visible on your site, and set everything else as invite-only.
(Invite-only just means you need to send someone the link in order for them to be able to find the page. It isn’t password-protected.)
🔗 Other Useful Links
👉 Want to use your own domain? Here’s how.
👉 Want to add images to your site? Here’s how.
👉 Want an overview of all your account-wide settings? Click here.
Website FAQs
What’s the best way to share my Paperbell website?
- Link Paperbell to your site navigation under an “Offerings” or “My Services” link
- Link to Paperbell from an Offerings/Services page on your site
- Link to Paperbell in your social media profiles as an easy way for clients to book your services
Can I customize my site link?
Yes! Your Paperbell URL will be automatically created as paperbell.me/your-name, but you can change it to paperbell.me/whatever-you-want, as long as someone else hasn’t gotten there first. 🙂
To edit your URL, click on the Website Editor tab at the top of your screen when you log in:

Click the Settings tab and you’ll be able to edit your URL as your heart desires!
How can I check how my site looks on a phone?
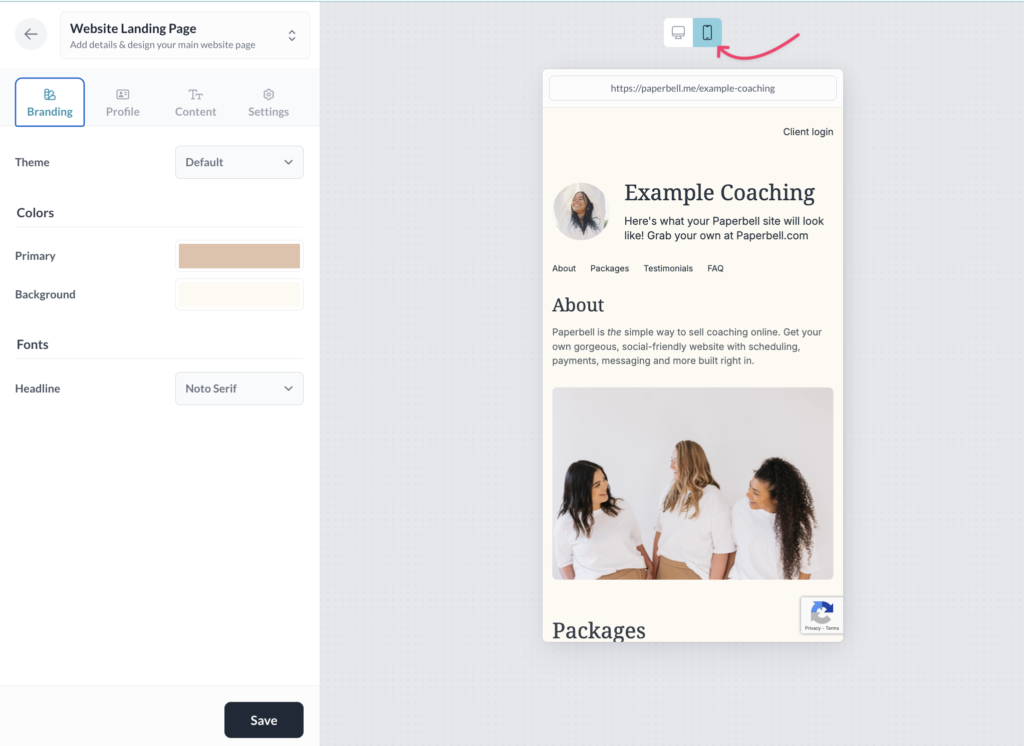
Click the little mobile phone icon to preview your site on mobile.
How do I remove a package from my Paperbell site?
Make the package status paused or invite-only.
Where does the “Contact me” link on my package landing page go?
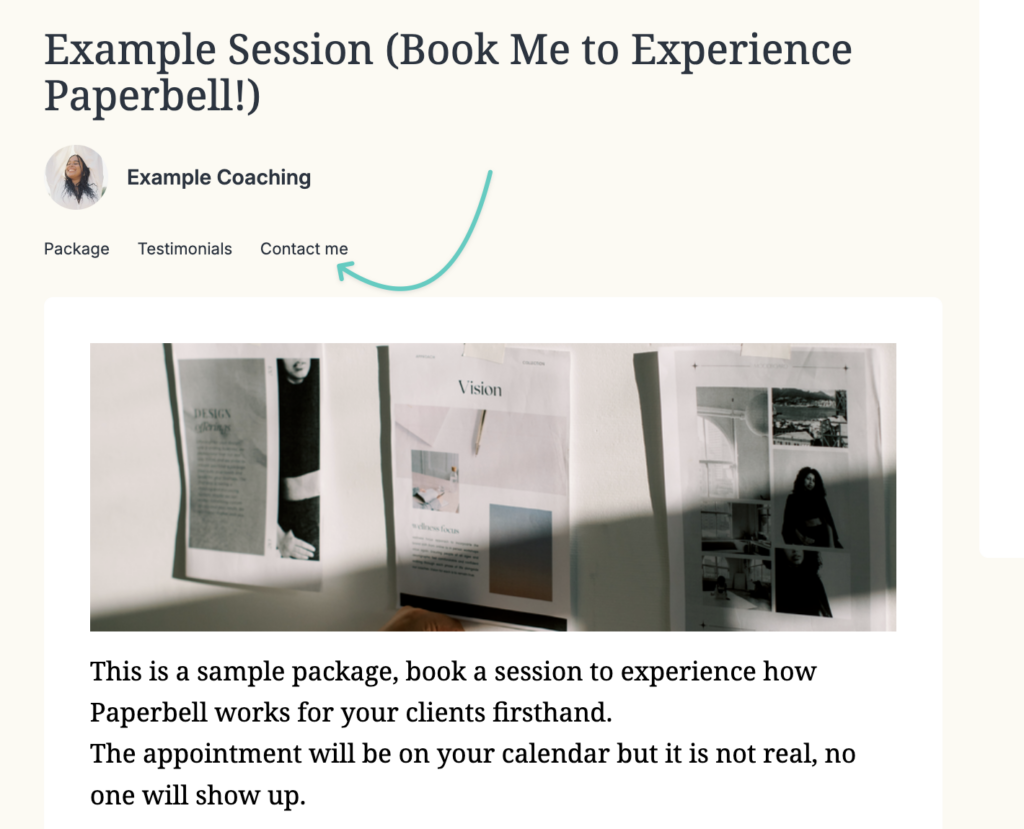
That’s a “mailto” link that automatically plugs in the email address you use for Paperbell.
If clients have a default email program set up on their device, when they click the link, their email program opens and a new email draft addressed to you pops up. Pretty snazzy!
How do I find my website URL again?
Click the Share button at the top of your screen. Click “copy link” in the box that pops up and you’re good to go!

Can I see an example Paperbell website?
Absolutely! Explore a live site here.
