Paperbell packages are the offerings that you sell to your clients. Your packages can include
- One-on-one appointments
- Group appointments or live online classes
- Digital downloads
- Or any combination of the above!
You’ll send clients to your Paperbell packages landing or booking page in order for them to schedule and purchase (or not purchase, in the case of free packages).
Default Paperbell Packages
Your new Paperbell website comes with two existing Paperbell packages, so you can hit the ground running 👟 👟
You’ll see:
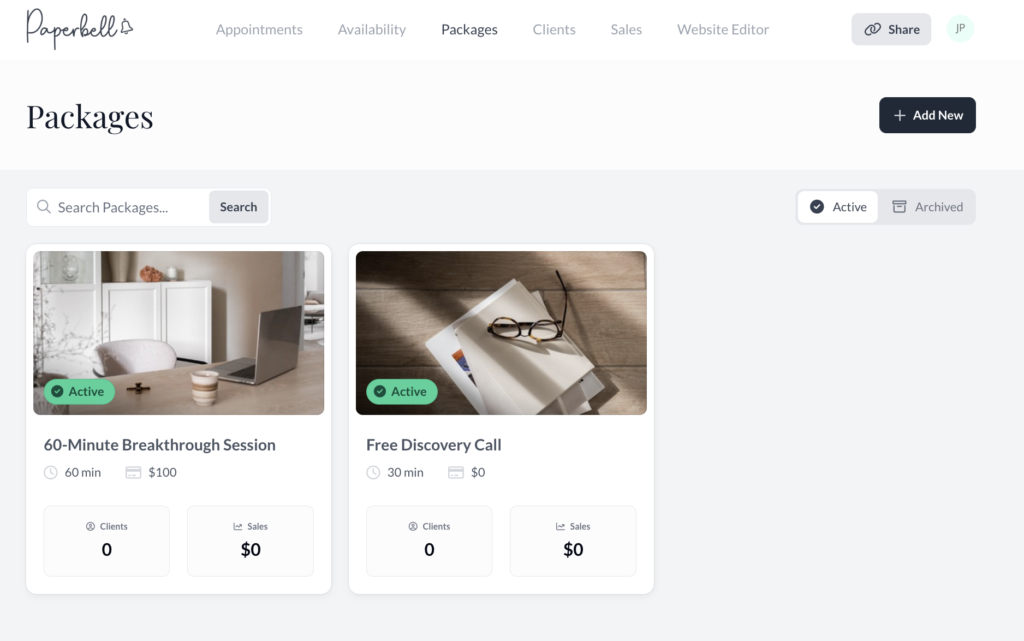
- A Free Discovery package with 1 x 30 min session
- A $100 Breakthrough package with 1 x 60 min session
- Templates for five more packages (see those by clicking +Add New)
For existing Paperbell packages, click on a package tile to edit it or see more detail, including how many clients have that package, and how much revenue it has generated.
Create Paperbell Packages
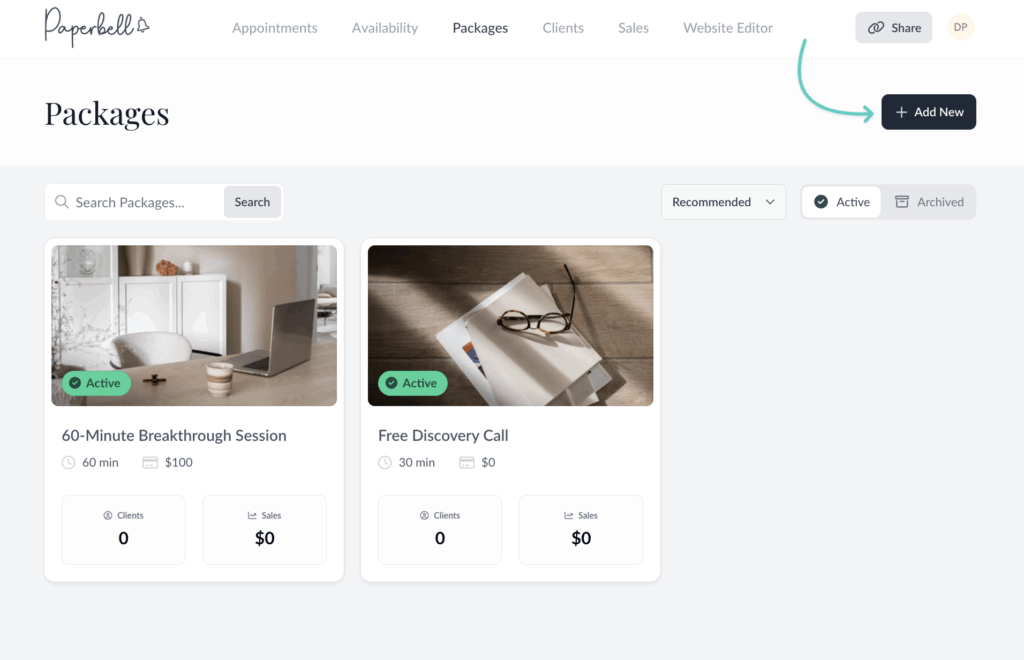
To create a package, click the Packages tab at the top of the home page, and then click the button that says + Add New.
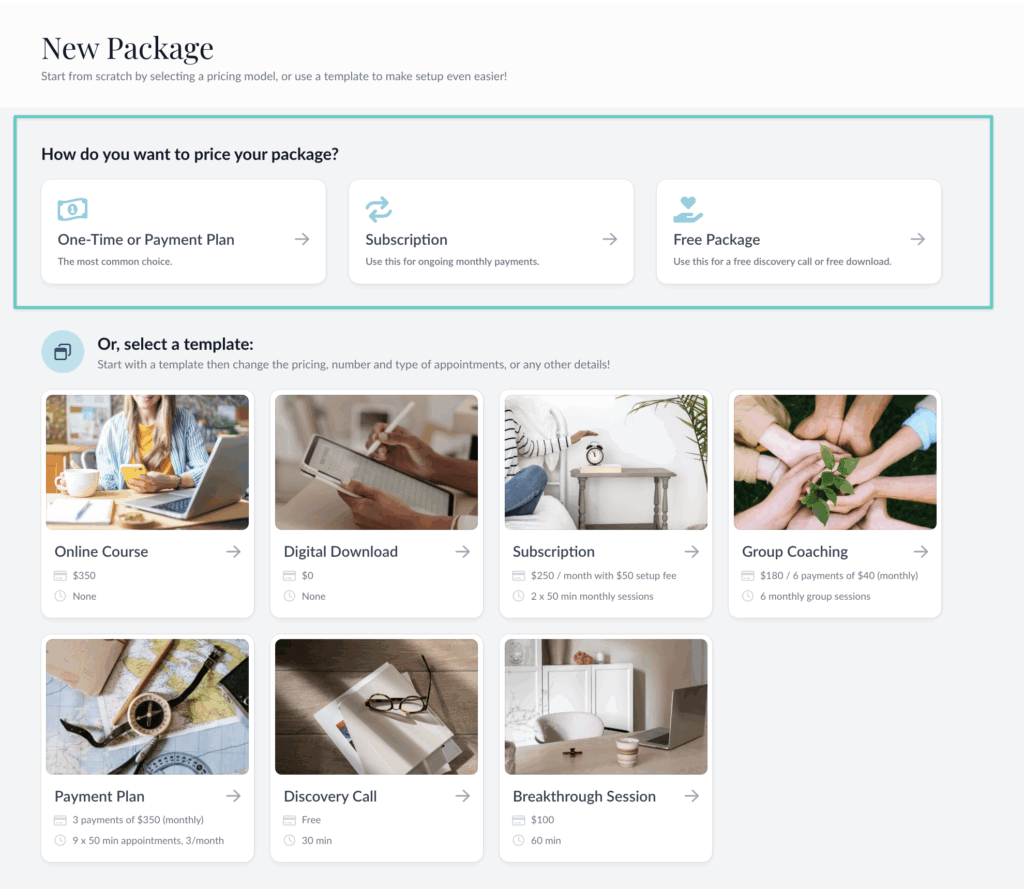
On the next screen, you’ll see Templates for packages that are ready to go (and editable by you), or you can start from the top and design your own package.
To design your own package, you’ll start by choosing what type of pricing structure it will have: one-time or payment plan, subscription, or free.
From there, you’ll edit each section of your new package. Keep reading to learn about each of these sections.
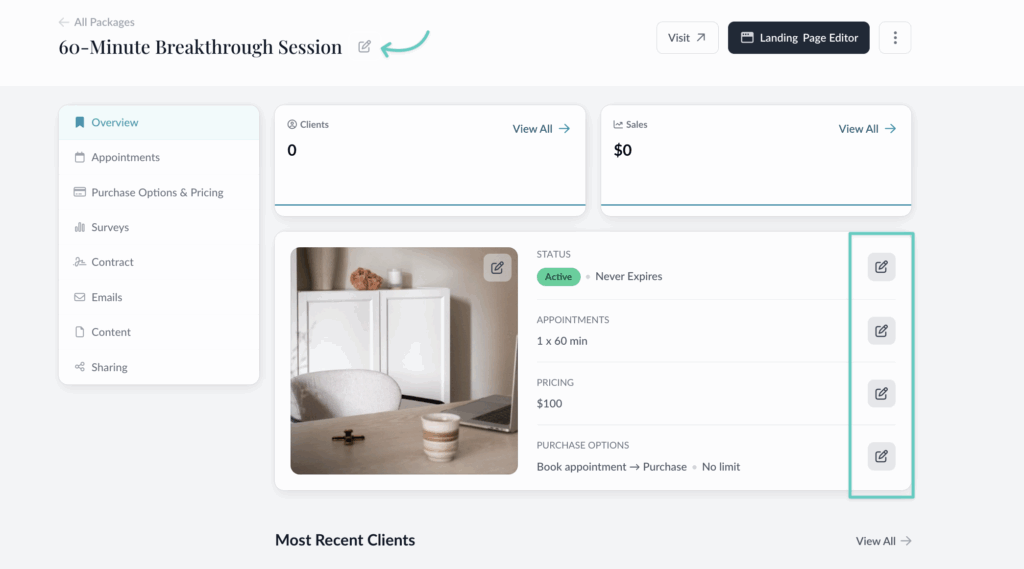
Overview
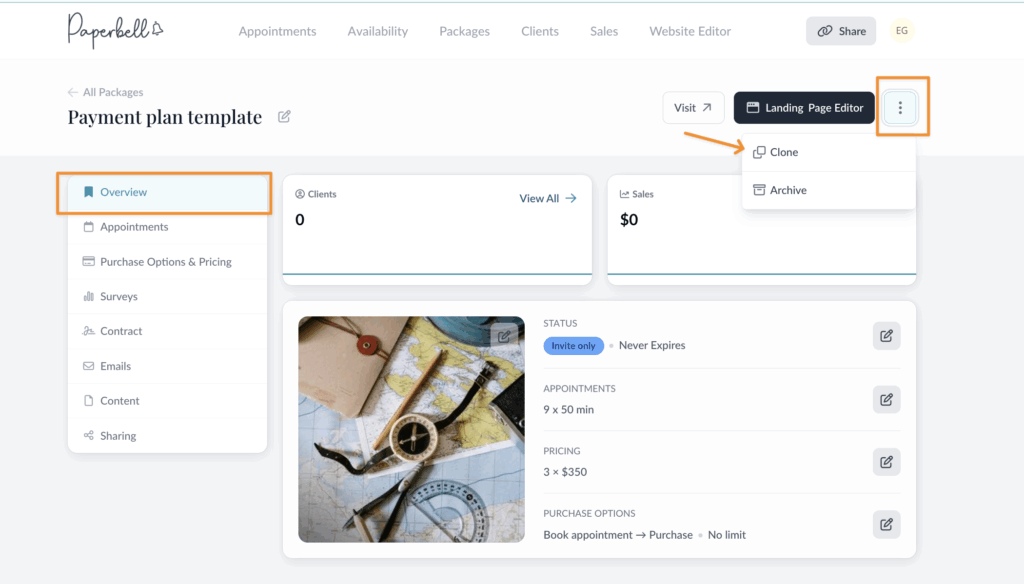
At the top of this section you can see the total number of clients and sales for this package.
Make changes to your Paperbell packages by clicking the pencil icons next to the package name and the status, appointments, pricing, and purchase options.
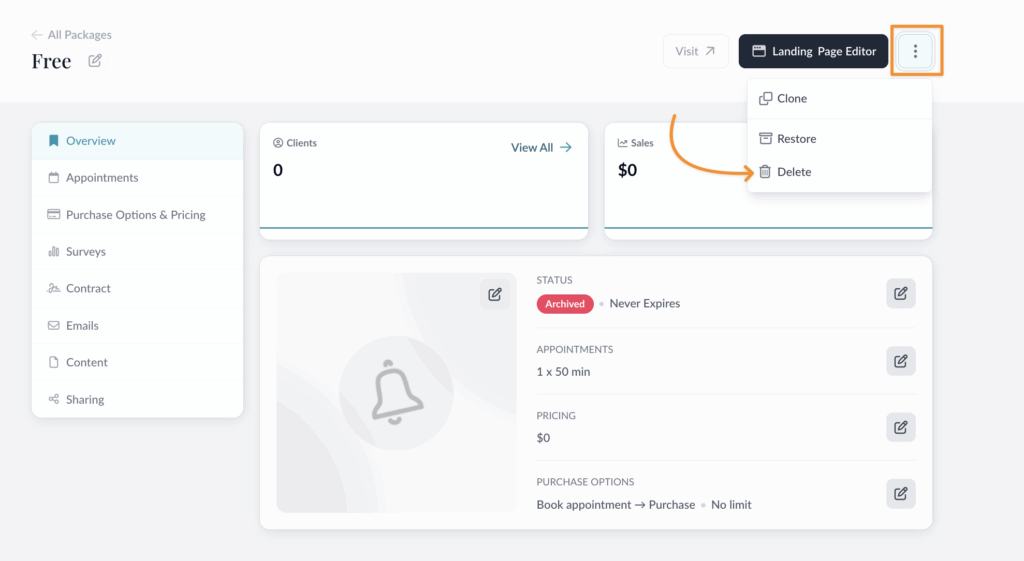
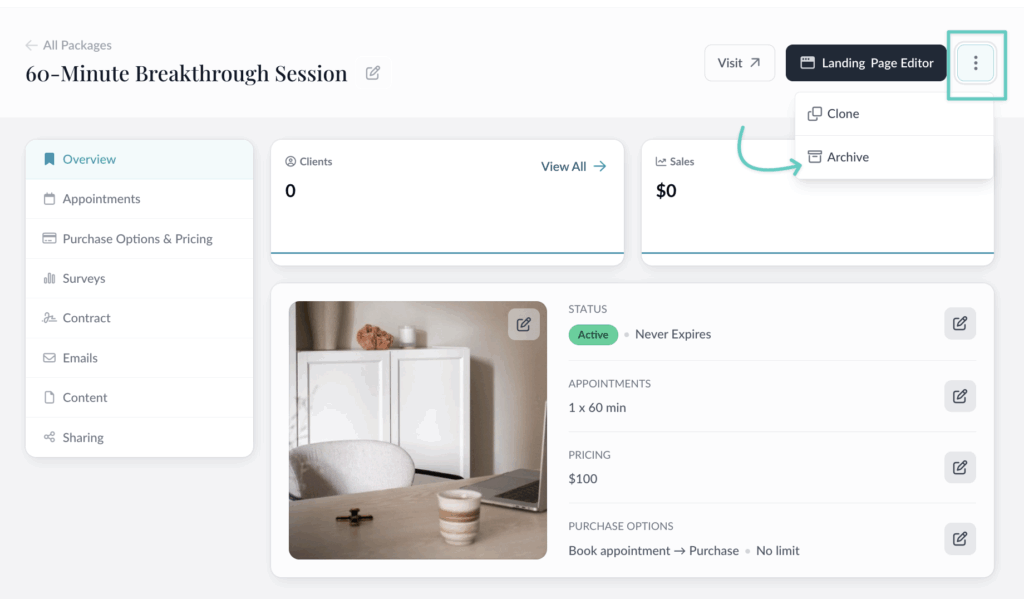
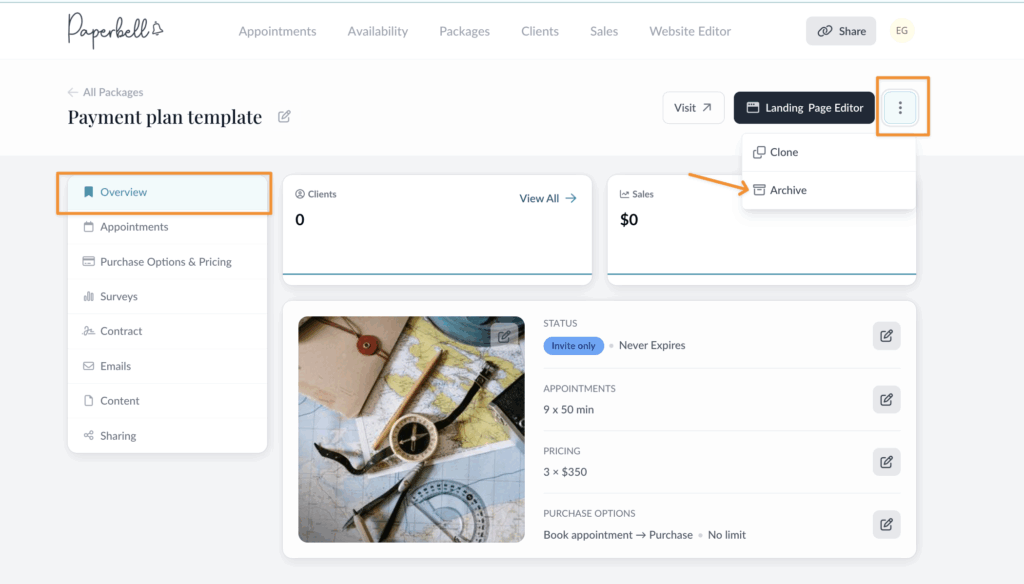
Archive a Paperbell Package
To make a package unavailable, archive it by clicking the 3-dot menu in the upper right corner. Choose “Archive” from the menu.
So if a package includes those but you’d no longer like to offer it for sale, set its status to draft instead of archiving
Name
The public name of your package, editable by clicking the icon next to the name. This will be visible to your client in several places.
Status
Click the pencil icon to change the package’s status.
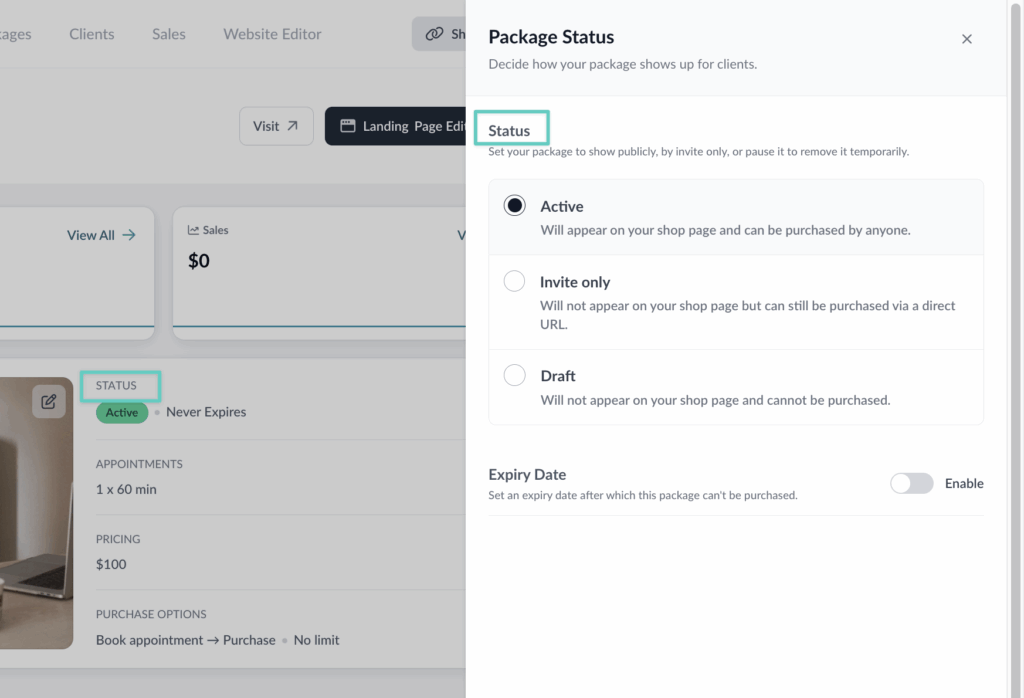
Active: the package is live and appears on your site
Invite only: the package is live but not listed publicly; you’ll share the direct URL with clients to buy that package
Draft: the package isn’t live, and cannot be purchased
Expiry Date: enable this if you’d like the package to be live only until a particular date
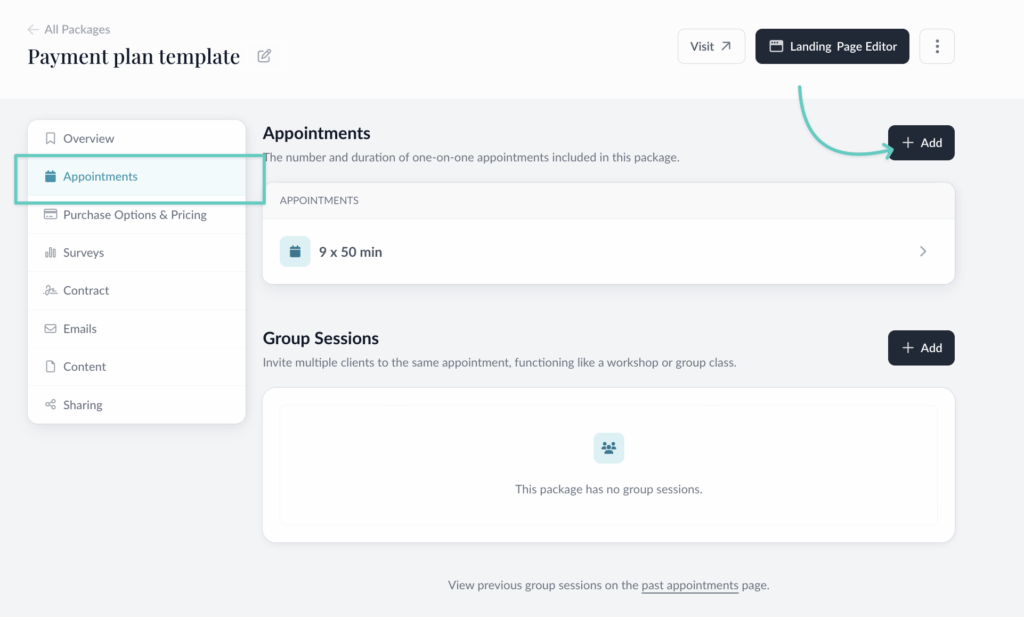
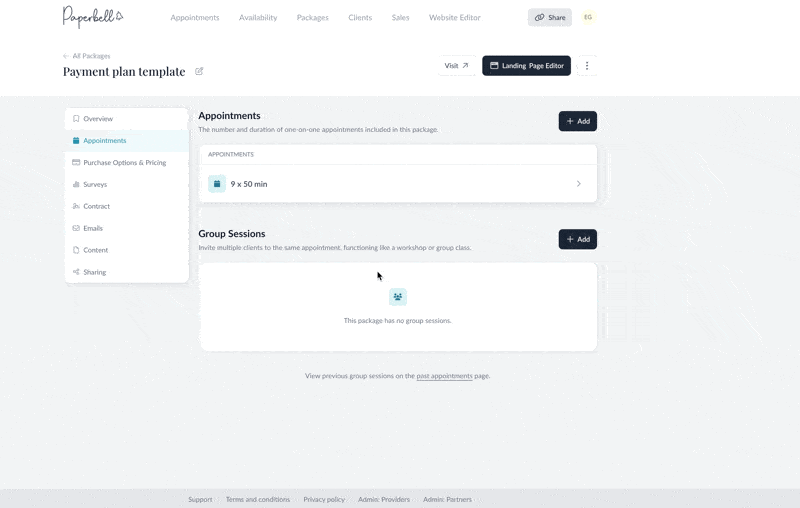
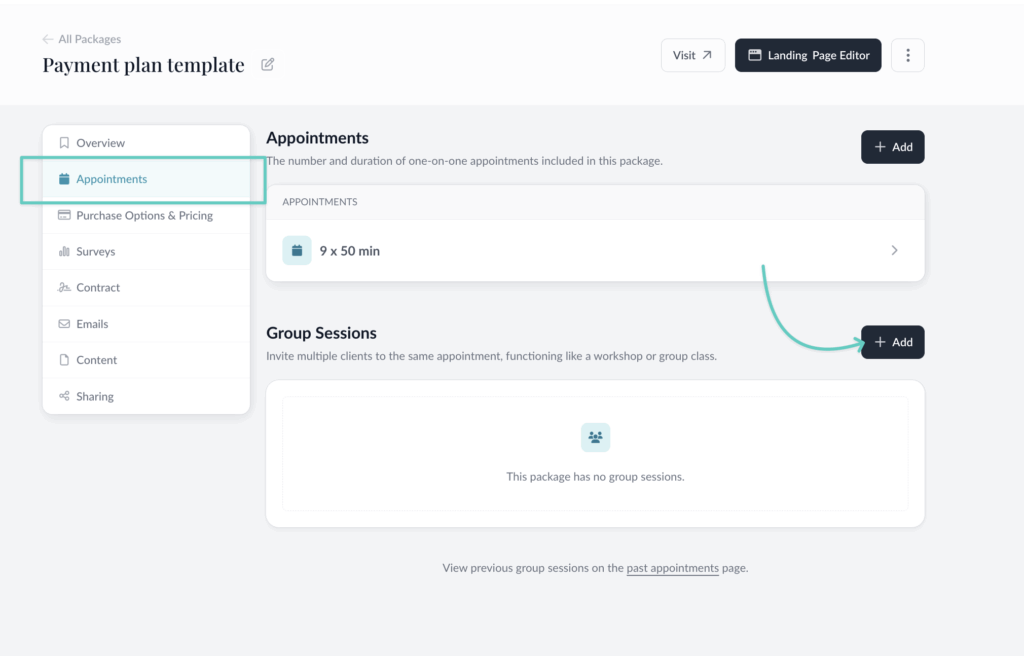
Appointments
The number of appointments you set here is the number of appointments clients with this package can book with you. So if you’d like to sell a multi-session package, create more than one appointment.
You’ll also set the length of sessions here. You can mix these up, if you want to offer sessions of different lengths within the package.
📣Important! When you have appointments of different lengths in a package, clients will book them in the order they’re listed in your package.
So if you have a package with appointments listed like this:
- 2 x 90 min
- 3 x 60 min
The client will book the two 90 min sessions first; and then they’ll be able to book the 60 min sessions.
You can break them up when you list them, if you want to bookend with longer sessions, for example. That could look like this:
- 1 x 90 min
- 3 x 60 min
- 1 x 90 min
Your client will book that intro 90 session, and then the three 60 min sessions; then they’ll be able to book the final 90 min wrap-up session.
To edit the number of sessions you offer in this package (before you’ve got any clients with it), click the arrow:
Clients will schedule their appointments based on your availability in Paperbell.
If you’d like to sell a package in Paperbell that contains no appointments, disable 1-1 appointments when you create the package, or delete any 1-1 appointments you have listed here.
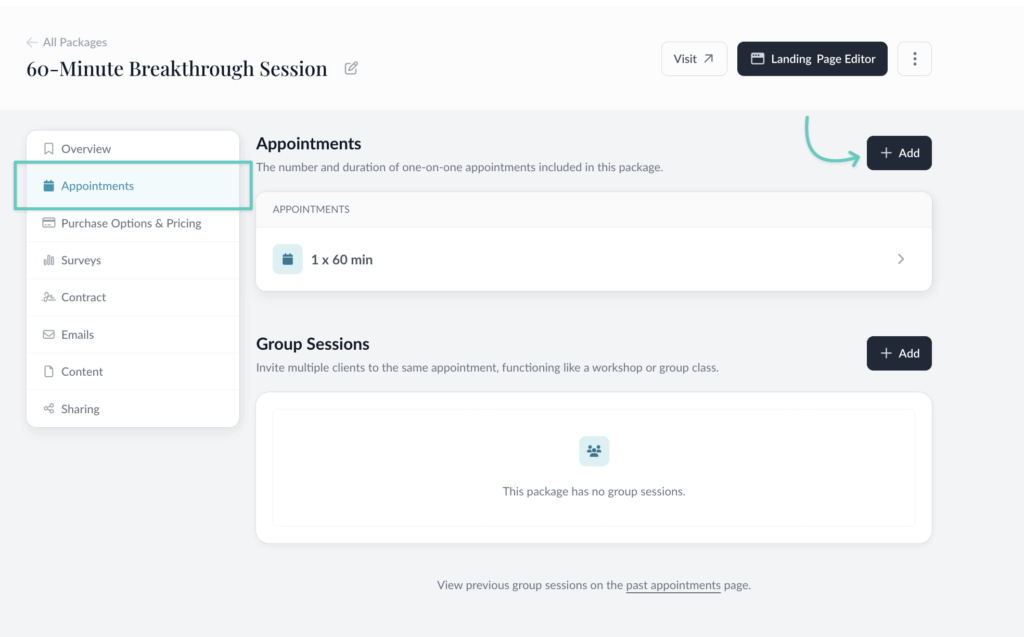
Group Sessions
Add group sessions to your package in the Appointments section. Group sessions are scheduled by you, and everyone with that package is automatically invited to them.
Do *not* include these in your session count when you add 1-1s. Group sessions are their own special thing.
Here’s more detailed information.
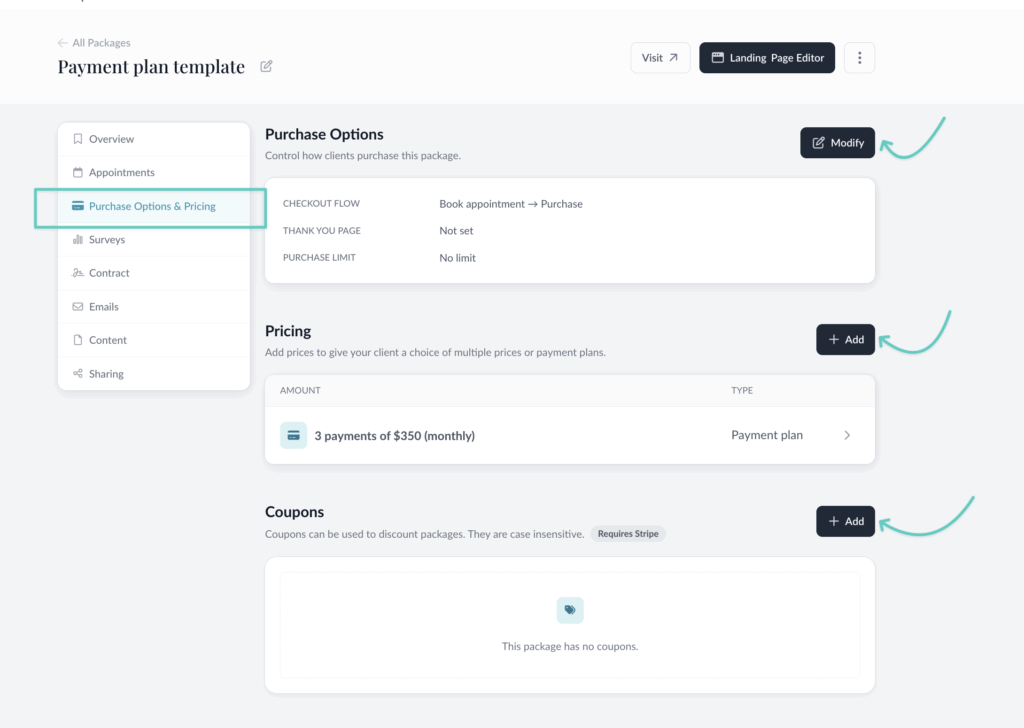
Purchase Options & Pricing
Checkout Flow
Checkout flow determines whether clients first schedule or purchase during checkout. We recommend a “book appointment first” checkout flow to allow a client to check if your availability works for them before buying the package.
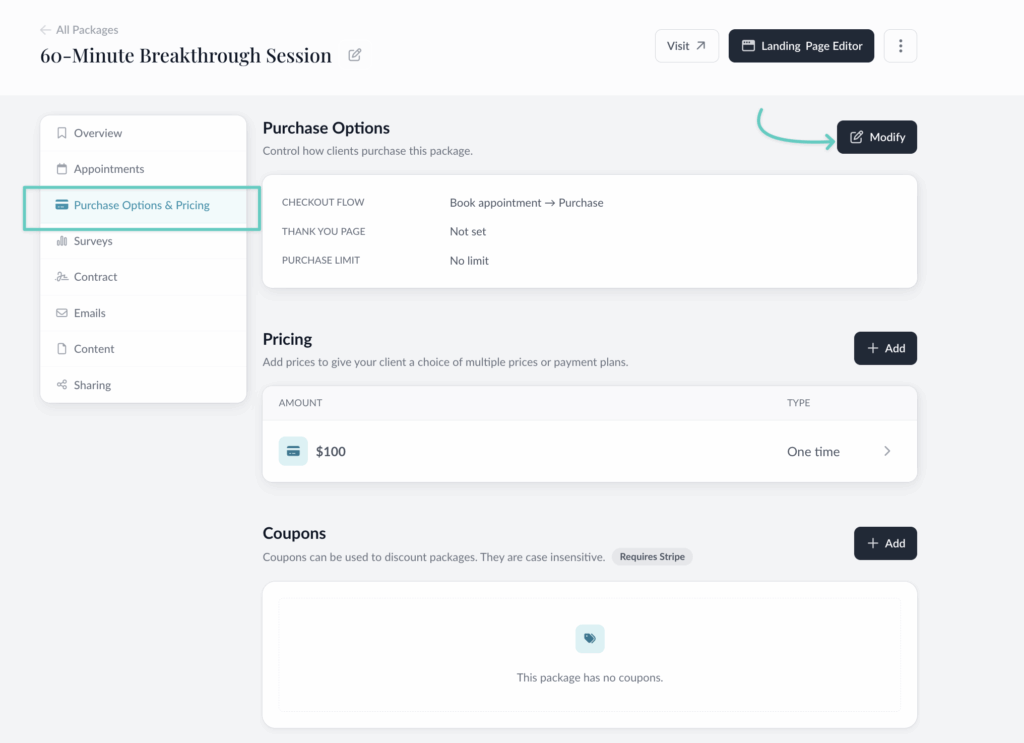
Some coaches prefer not to share availability until the purchase has been made. If this is you, choose the “Purchase –> Book appointment” flow.
You’ll set the checkout flow during the package setup, but you can click the Modify button here to change the flow.
Thank You page
To automatically send your clients to a specific page on the web after their purchase, add a URL here.
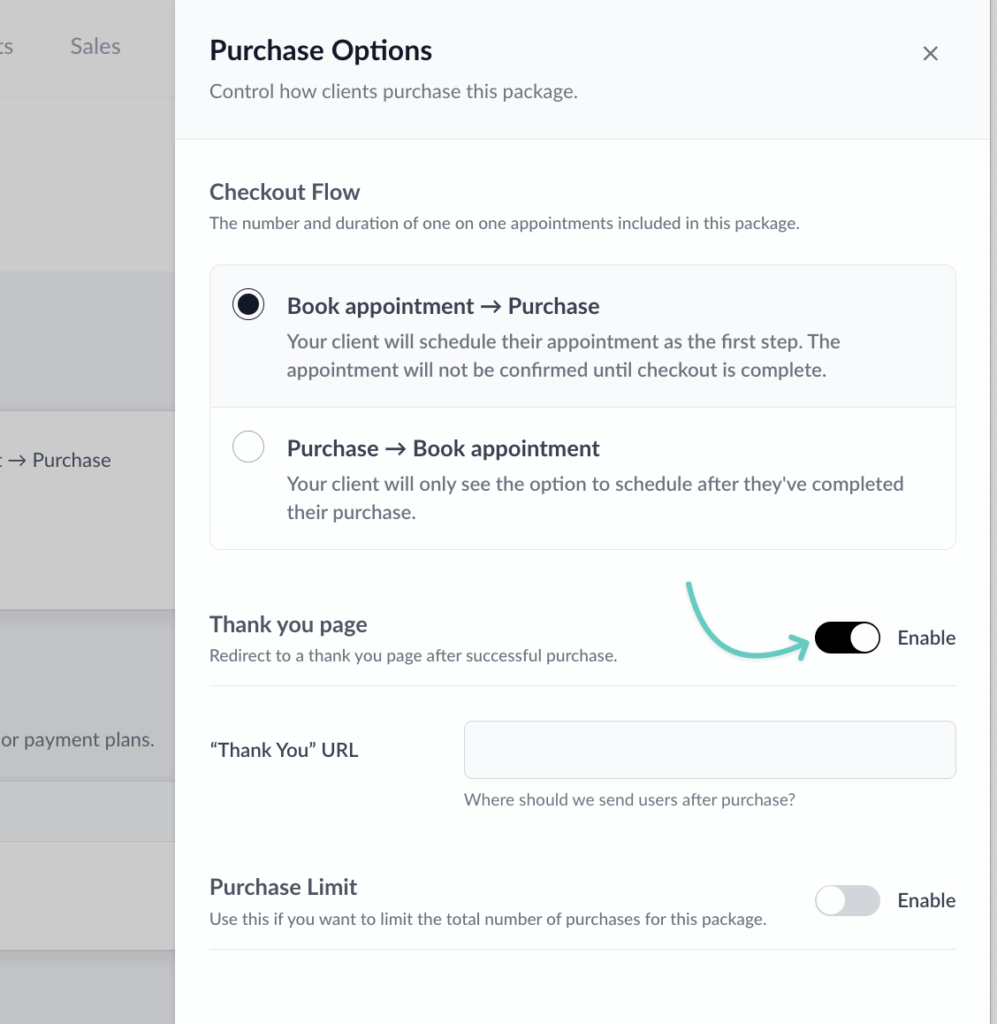
This is particularly useful for adding outside tracking codes to the Paperbell experience, such as a Facebook Pixel or Google Analytics Tag. Read more about this option.
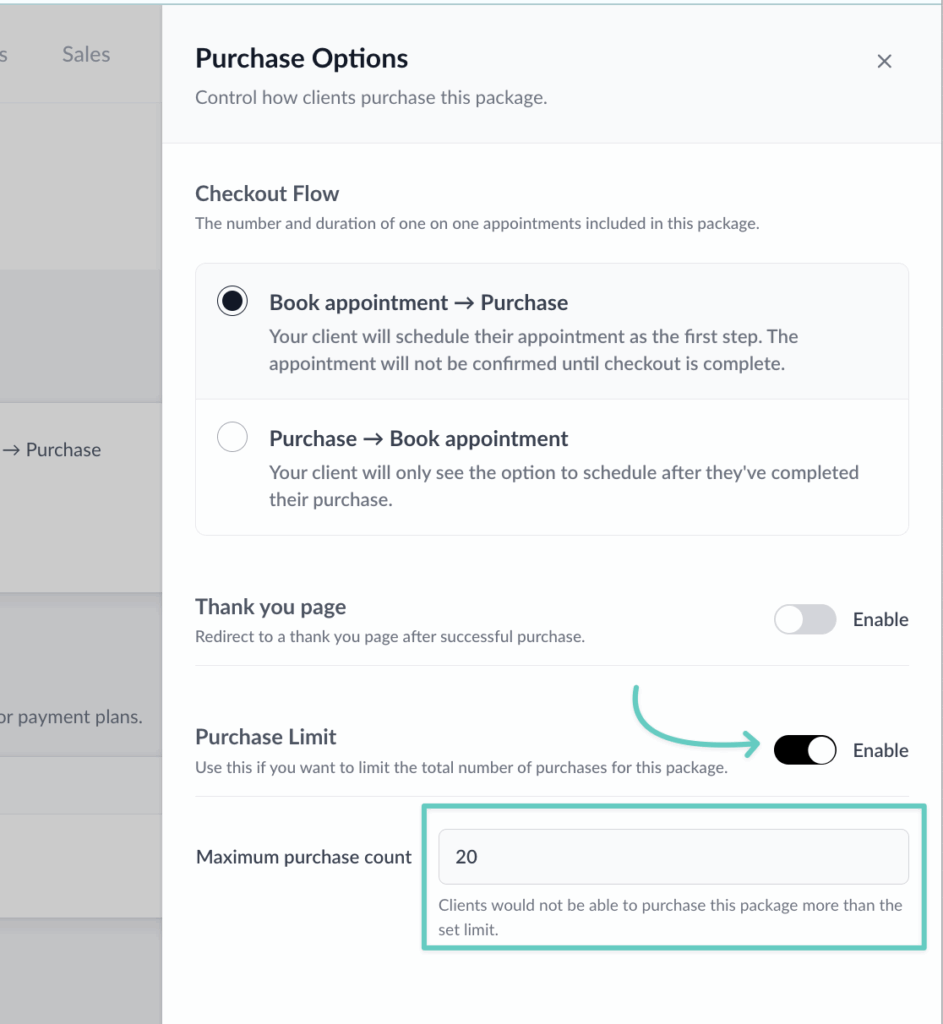
Purchase limit
Enable this to limit the number of times a package can be purchased.
For example, if you create a group coaching program that should include no more than 8 clients, enable the purchase limit and set it to 8.
Pricing
Paperbell offers three ways to bill your clients:
One Time Payment
- This will charge one flat fee at the time of purchase with no future payments. You can use this to sell one session or to sell a package of sessions paid for upfront
Monthly Subscription (Stripe only)
- This is for ongoing subscriptions or “sessions per month” packages. In this billing type you choose how many sessions to grant your clients per month, and clients are automatically billed every month indefinitely until they cancel their subscription within Paperbell. This is for all recurring payments.
Payment Plan (Stripe only)
- Choose this option to break your total price up into multiple payments. Unlike monthly subscriptions, only a set amount of payments will be charged. If you want to give clients a set amount of sessions and allow them to pay over a set amount of time, use this option. This is also referred to as an installment plan, or using a deposit. You can choose from the following payment frequencies: weekly, every 2 weeks, monthly, every 2 months, every 3 months.
Add Prices
You can add multiple prices to the same package in order to create payment options such as a pay-in-full discount, or extended payment terms. Read more about multiple prices here.
You can also create an additional set up fee that will be added to the initial purchase.
Coupons
Use coupon codes to offer a percentage discount to your clients. Or create a 100%-off coupon as a way to grant access for free.
Landing Page
This is where you tell the world about your offering! Check out this blog post for advice about what to write on your Paperbell landing pages.
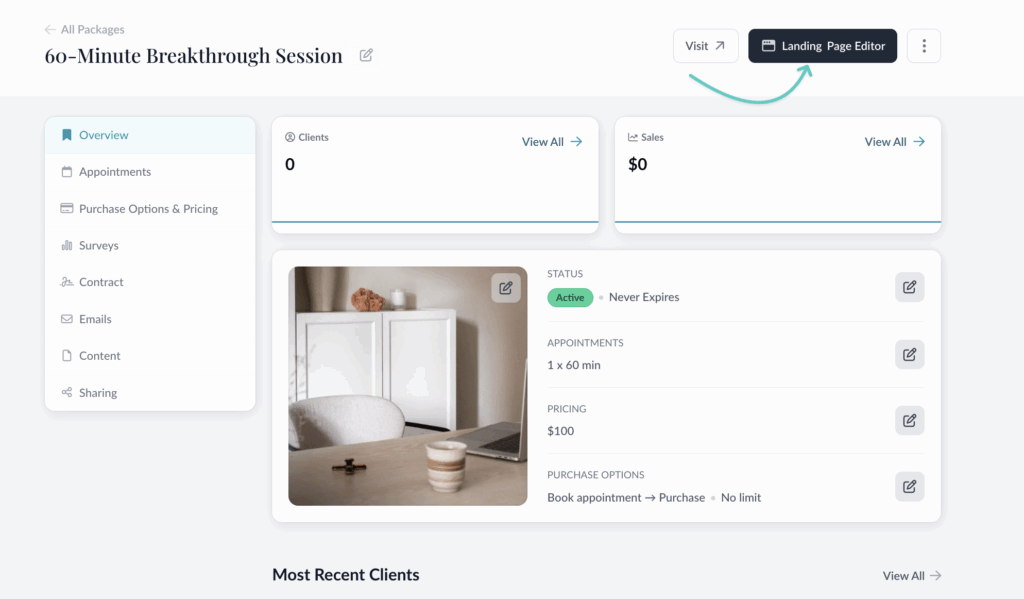
Click Landing Page Editor to jump right into the editor for that package’s landing page:
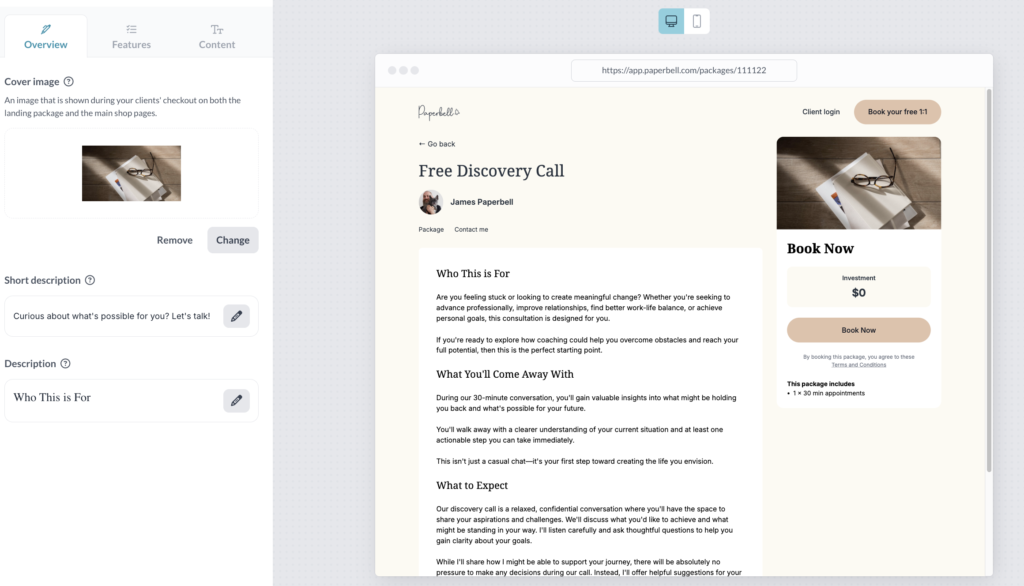
Overview
Add a Cover Image to augment your package description. This image will also show up on your homepage, where all your live packages are visible.
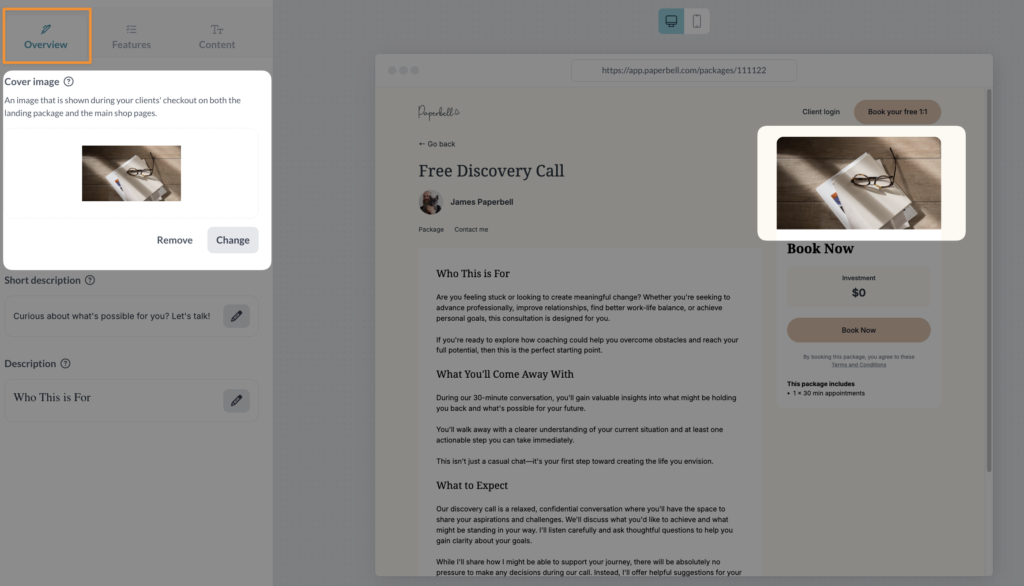
We recommend making your image 800 pixels wide x 450 pixels high. And we made you a template!
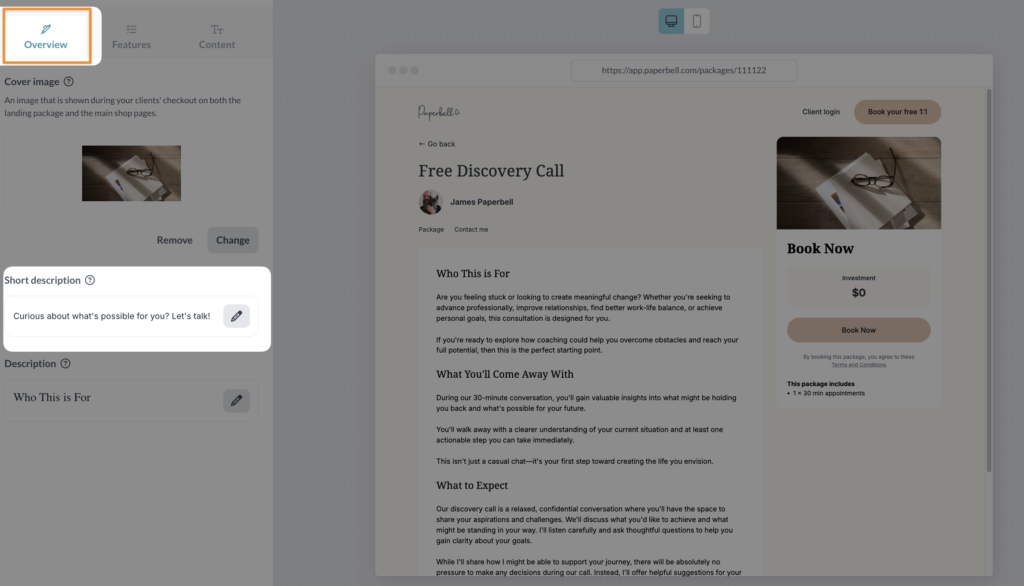
Capture the essence of this offering in the Short description: It pairs with your cover image to represent this package on your homepage.
Use the Description section to go into depth on the details of this package.
Some ideas of what to include:
- The goal of this package
- The outcomes your client can expect from working together
- Your bio
- Case studies of other clients
- Your unique philosophy
- Add images and embed YouTube videos
Features
The features tab is where you can edit the short, punchy list of what’s included in this package.
Similarly, if you make changes here, it doesn’t change what the clients will actually receive. To change what the client gets, you’ll need to change the package details in the Summary tab.
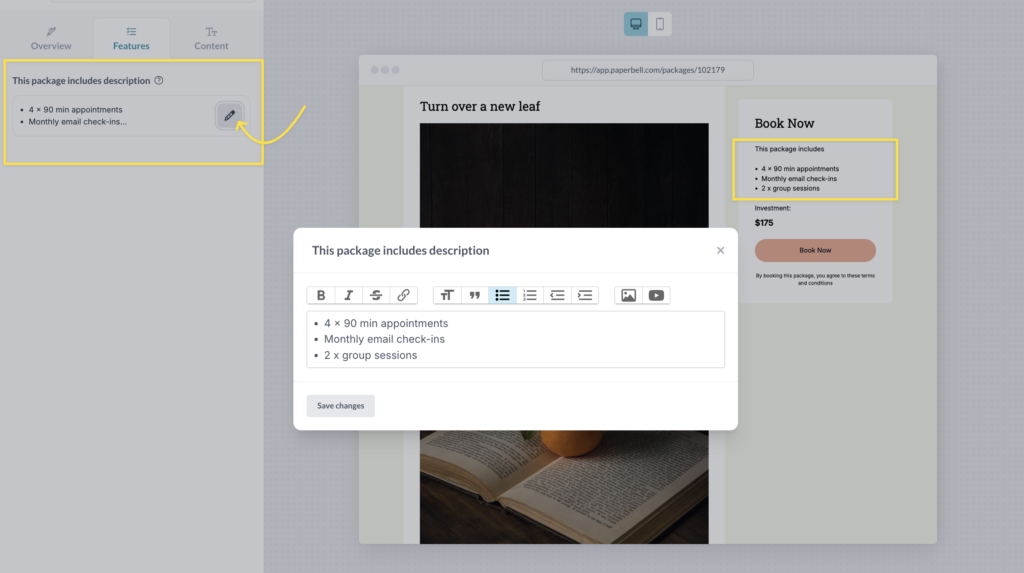
Below the feature area, you’ll see the price for your package and the button clients click to begin checkout.
Curious about whether “Book Now” can be changed? Read all about here.
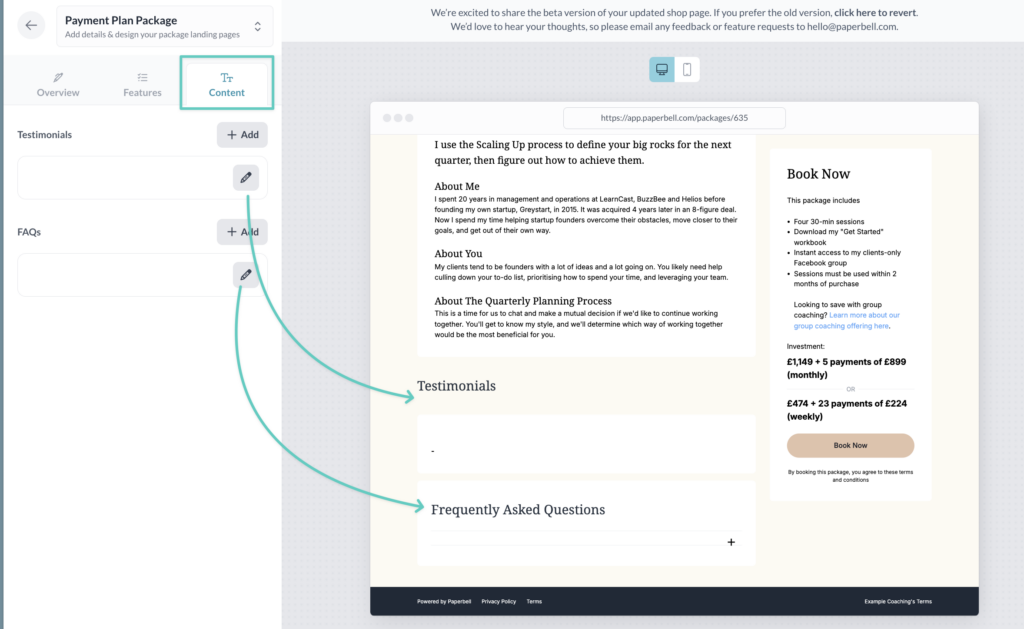
Content
Share the love, and answer questions you anticipate by adding Testimonials and FAQs from the Content tab.
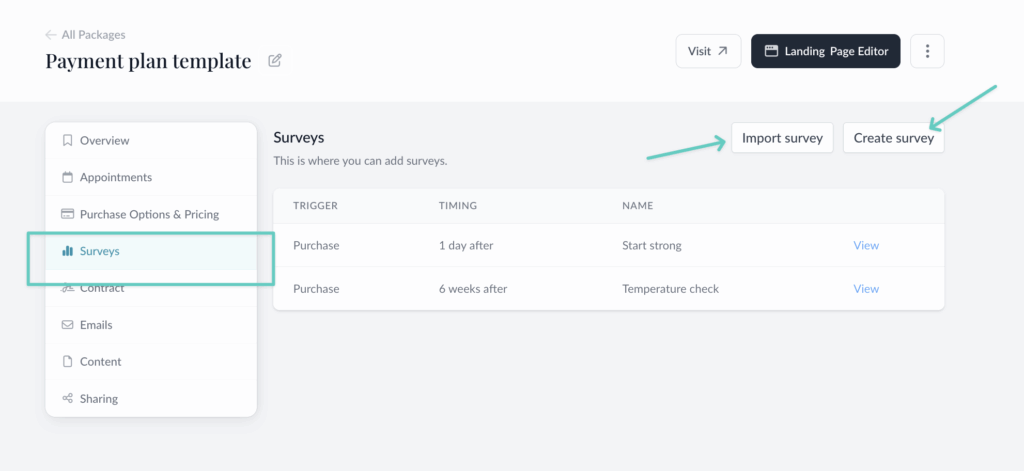
Surveys
Create surveys/intake forms/questionnaires, and decide at what point clients receive those surveys. Add as many questions as you like, and the answers will appear on your individual client profile pages.
Surveys are package-specific: they only appear for clients of the package you’re currently editing. If you’d like to copy over a survey from one package to another, click “Import survey.”
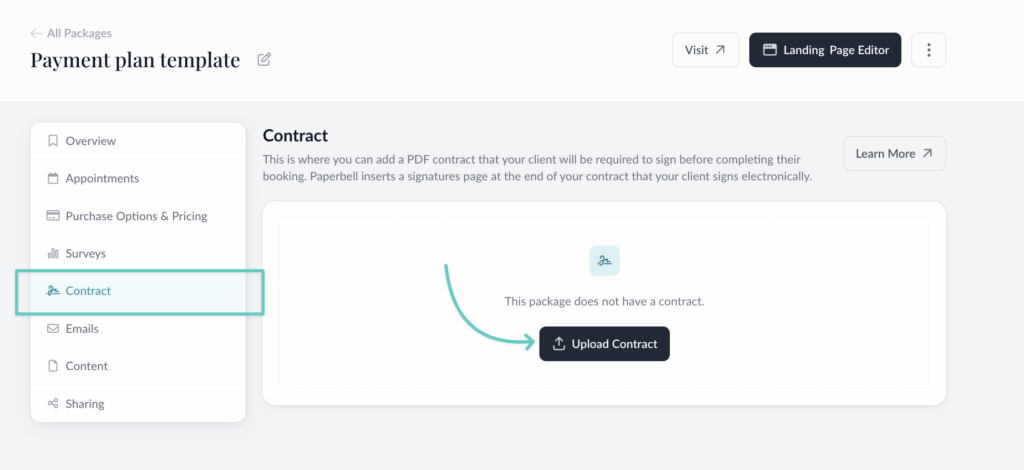
Contract
When you add a contract, your clients will be required to sign before they can complete their purchase.
Our contract integration, DropBox Sign, inserts a signatures page at the end of your contract that your client signs electronically.
Learn more about how it works here.
Emails
You can have Paperbell can send customized email reminders based on certain triggers:
- Appointment
- Group Session
- Purchase
- Reminder To Book
- Final Appointment
Click into the Emails section and then the +Add button to create a new automated email.
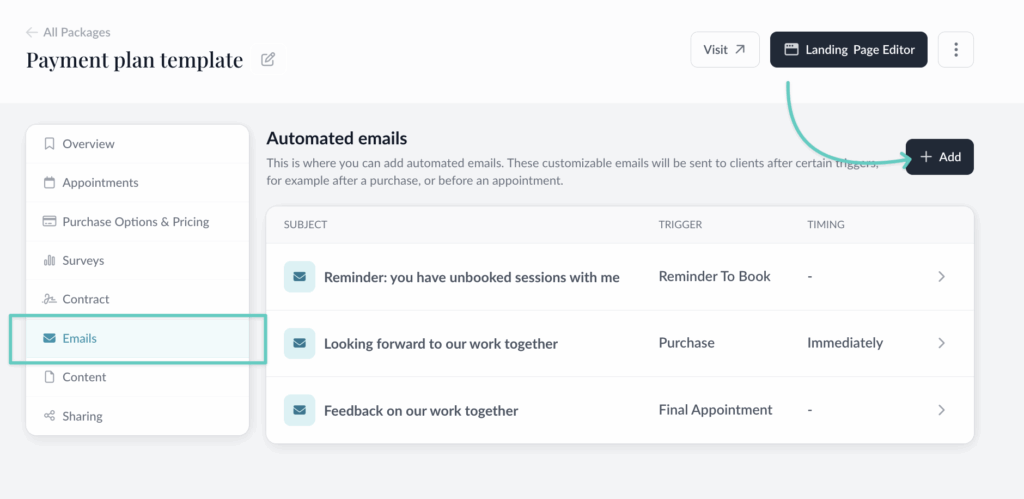
To edit existing automated emails, click the arrow for that email:
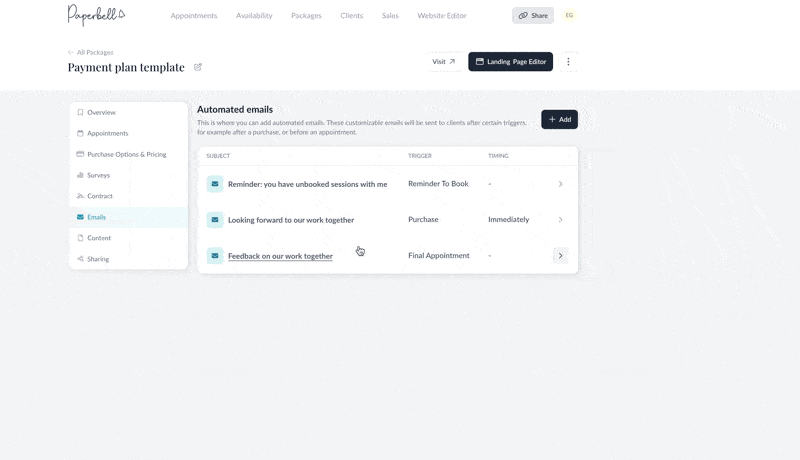
Automated mails are package-specific: they only apply to clients of the package you’re currently editing.
Here’s our in-depth walk-through of automated emails and how to use them.
Need more advice on what to say in the emails? Check out this article.
Content
Want to share handouts, worksheets, or other resources with your clients? This is the place!
Upload as many files as you like, and clients will access them inside the Client Portal (https://PaperbellClient.com/).
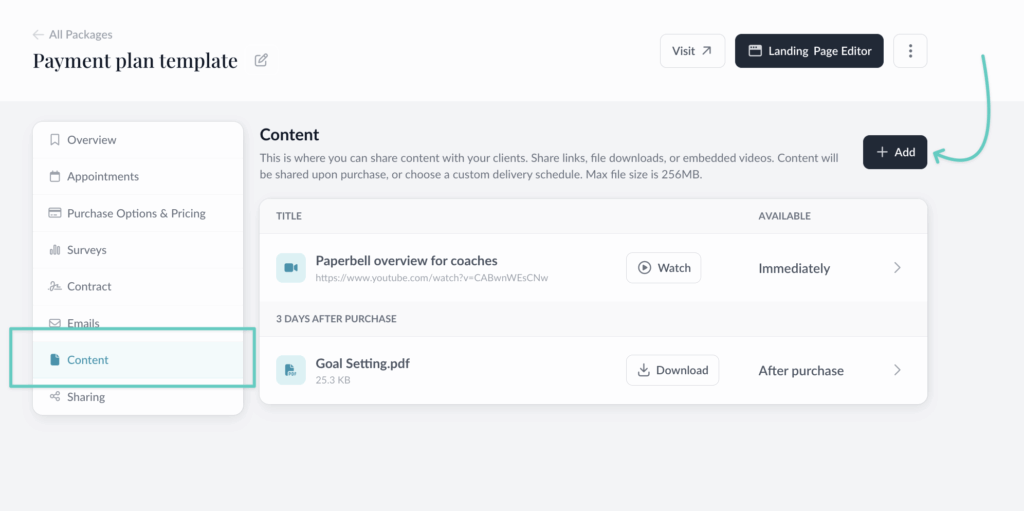
You can use this feature to sell standalone digital downloads, or to include them in your coaching packages. Learn more about selling digital downloads on Paperbell here.
Sharing
Access all of your package-specific links (plus client login and website URL, which always stay the same) from this tab. You’ll also find your embedded calendar code.
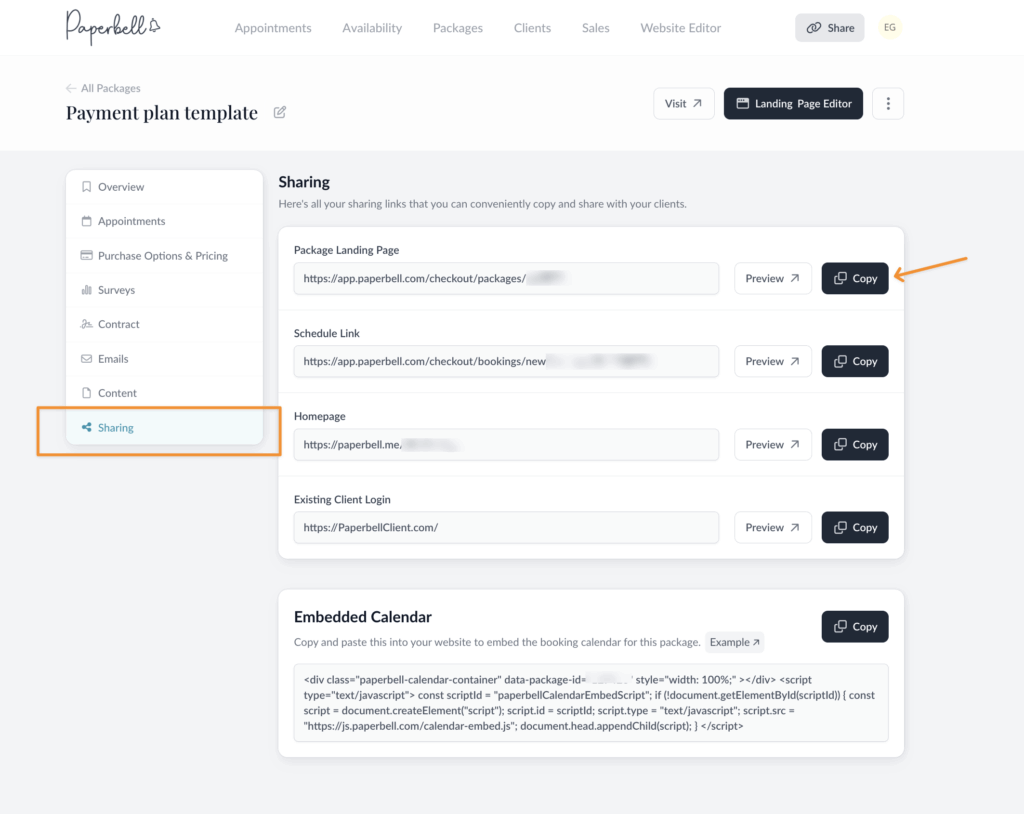
- Package Landing Page
This is the URL of your package landing page. It is what you share with the world! Here’s more info on integrating Paperbell into your website and other marketing.
- Schedule Link
This link takes your prospect right into your “checkout flow,” whether that is payment first or scheduling first.
Use this link if you want to skip the package overview page. For example, maybe you’ve created your own package overview on your site and you want to use a “Buy Now” button that links straight into the scheduling/booking process. Use this link. Here’s more info on integrating Paperbell into your website and other marketing.
- Homepage
This links to your Paperbell homepage, an overview with all publicly available packages.
- Existing Client Login
Looking for the link to send your clients so that they can access their downloads or schedule more appointments? This is it! Note that this is a universal link, as it’s not specific to any single package.
- Embedded Calendar (on the right side)
Copy and paste this into your website to embed the booking calendar for a specific package. Go here to learn exactly how to do this.
Clone a Package
It’s only one step to recreate an existing package. This is handy if you want to change the appointment length or price of an existing package, but you already have clients signed up for that package.
When you’re in the Overview area of your package, click the three dot menu in the upper right corner. Click “Clone” and now you’ve got two of this package!
Archive a Paperbell Package
You can pause a package that you don’t need listed on your homepage now, but might bring back one day.
Or, if you want to remove it from your active packages, archive it by clicking into the Overview, then the three dot menu, then choose “Archive” from the menu.
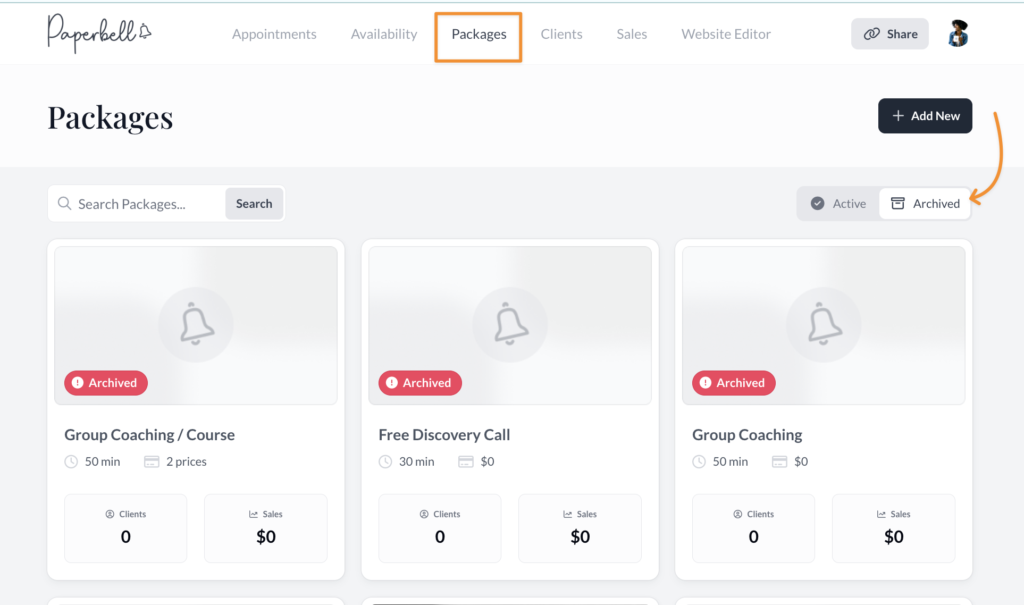
Find all your archived packages by clicking the toggle from your Packages page:
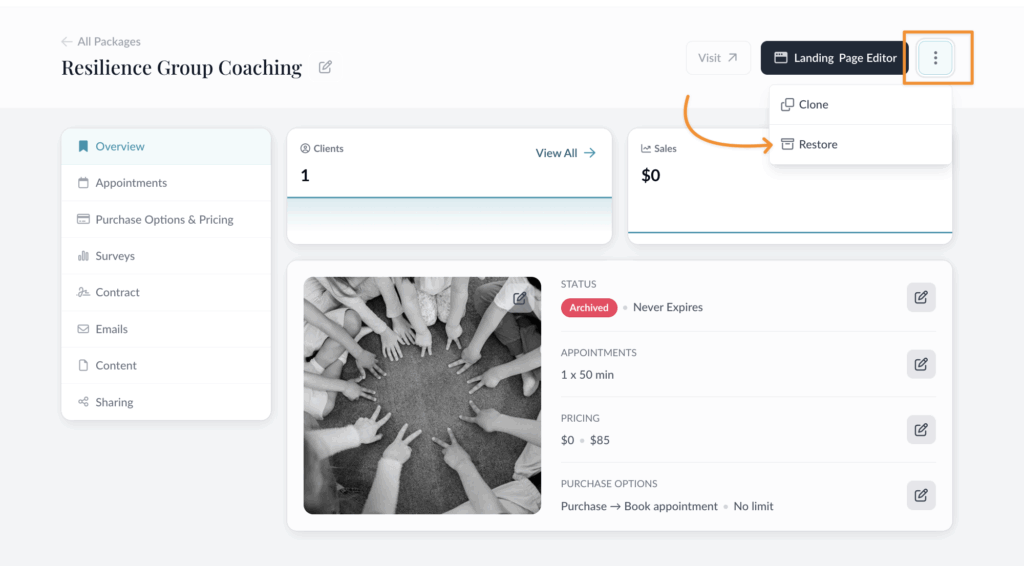
Unarchive a Package
Find the package from the Archived tab of your packages, and click the three dot menu in the upper right corner.
Click “Restore” and it will be back with your active packages.
Delete a Package
If your archived package doesn’t have any clients, you can also delete it completely. But we can’t bring it back once it’s deleted, so please make sure this is your goal before clicking that button: